Skillet Mac & Cheese Pizza Style

Appliances Reviewed is reader-supported. When you buy through links on our site, we may earn an affiliate commission.
As an Amazon Associate I earn from qualifying purchases.

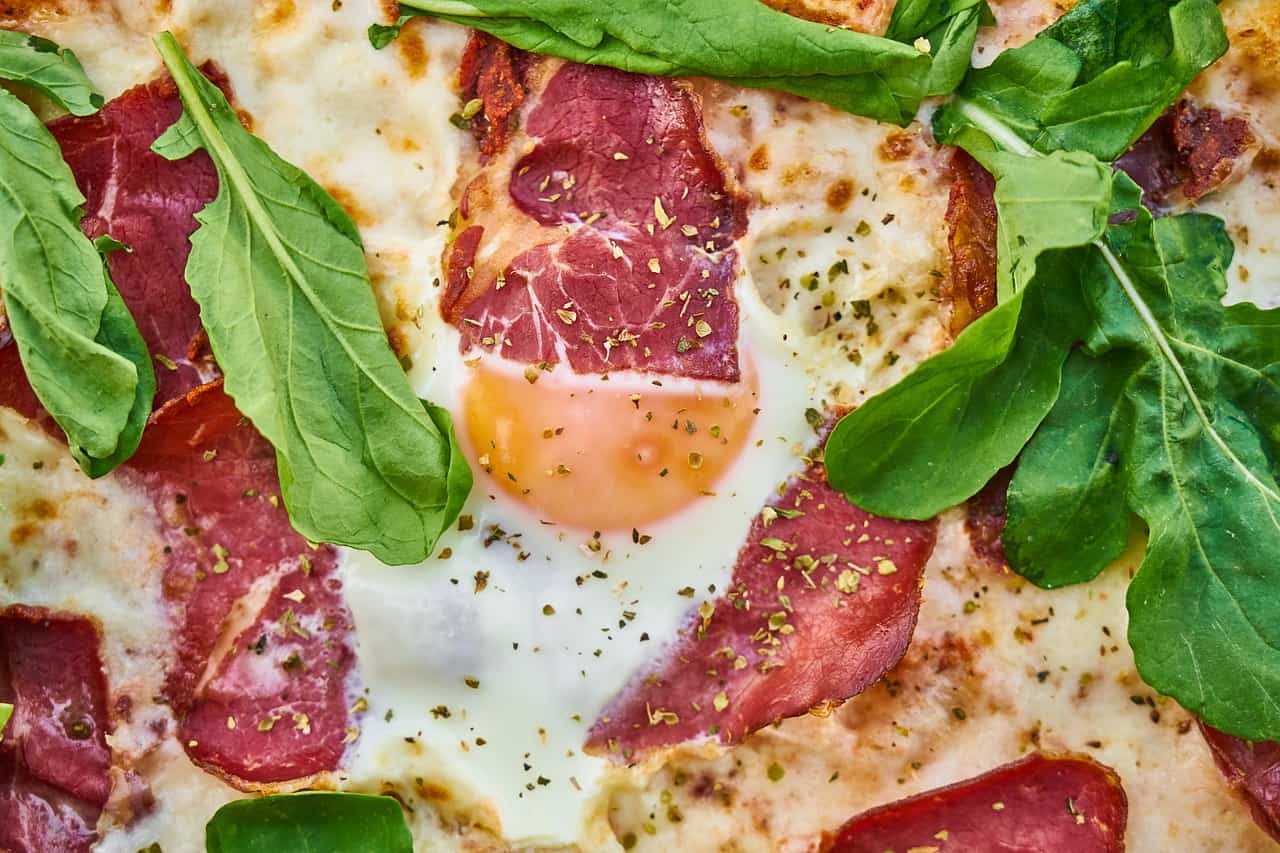
“a heavenly combination of two of the most loved flavors”

How many nights have you thought about what’s better, pizza or mac & cheese? Maybe you even debated it with your foodie friends? I know I have thought about it long and hard, and then some while back, I found this recipe titled “Pizza Mac & Cheese,” and I was like, why hasn’t this occurred to me before!

Long story short, I experimented with it for a while until I found that sweet spot, between the two most popular meals, that makes my mouth water just thinking about it.

So, before I go and make it one more time, here’s the recipe.

Everything you’ll need for this recipe, except for the ingredients listed below, is one saucepan and an oven-safe skillet. It won’t take much time, as the whole prep and cooking time takes around 40 minutes, including the boiling time for the macaroni. So, let’s start cooking.

The first step is to prepare the macaroni. Boil 1 litre (4 ½ cups) of water in a large saucepan. Add a little bit of salt, olive oil, and the macaroni. Let them cook from around 8 to 11 minutes. Make sure to follow the instructions on the package because if you overcook them, they’ll become too soft, and they won’t hold up when you continue cooking them afterward.

When the pasta is done, retain one cup of the pasta water, while you drain the rest. Rinse them with cold water and set them aside.

The next step is to add 1 tsp of olive oil in the oven-safe skillet and let it heat for a few minutes over medium heat. Meanwhile, you can prepare the onion. Cut it into tiny pieces (a mandolin slicer makes this really easy) and add them to the skillet. Cook for one to two minutes until the onion becomes translucent.

In the meantime, pre-heat the oven to 250°C (500°F), so that it’s ready when you’re done sauteing the meal.

When the onion is ready, add the butter and stir until it melts completely. While you continue to stir, slowly add the flour to create a roux. Now, I personally know how easy you can burn the roux, so keep stirring all the time. After a few minutes, pour in the milk and let it cook until it boils. Just make sure there’s no onion stuck at the bottom of the skillet. Mix everything well.

The next ingredients to add are the tomato sauce, the Italian seasoning, and the salt and pepper. It’s your choice whether you want to skip the seasoning or add something you prefer, it’s totally okay, even encouraged! I’m sure many people wouldn’t mind oregano, although I personally prefer to sprinkle just a little when I’m serving the dish.

Again, mix everything and then add the macaroni, only half of the pepperoni slices, and just a little over half (one cup) of the mozzarella cheese. Once everything is well combined, and the mozzarella is melted, you’ll feel just how creamy the whole mixture is.

If it’s too thick or dense for you, now it’s the time to use that cup of pasta water you reserved for this purpose. Pour the water really slowly as you can always make the meal more watery, but at this point, you can’t make it creamier. This is completely optional, of course, and depends on your personal preference.

Turn the stove off and set your skillet aside. Sprinkle the parmesan cheese (or cheddar) on top, then layer the rest of the pepperoni slices, and finally, scatter the rest of the mozzarella cheese over the pepperoni. Now, your mac and cheese pizza is ready for the oven. However, be careful not to leave it in for too long. If your oven is pre-heated, you’ll see the mozzarella on top melting and becoming brown in just 4-5 minutes – this is your sign to take it out.

It’s great if the cheese is a little brown here and there, but it shouldn’t be burned!

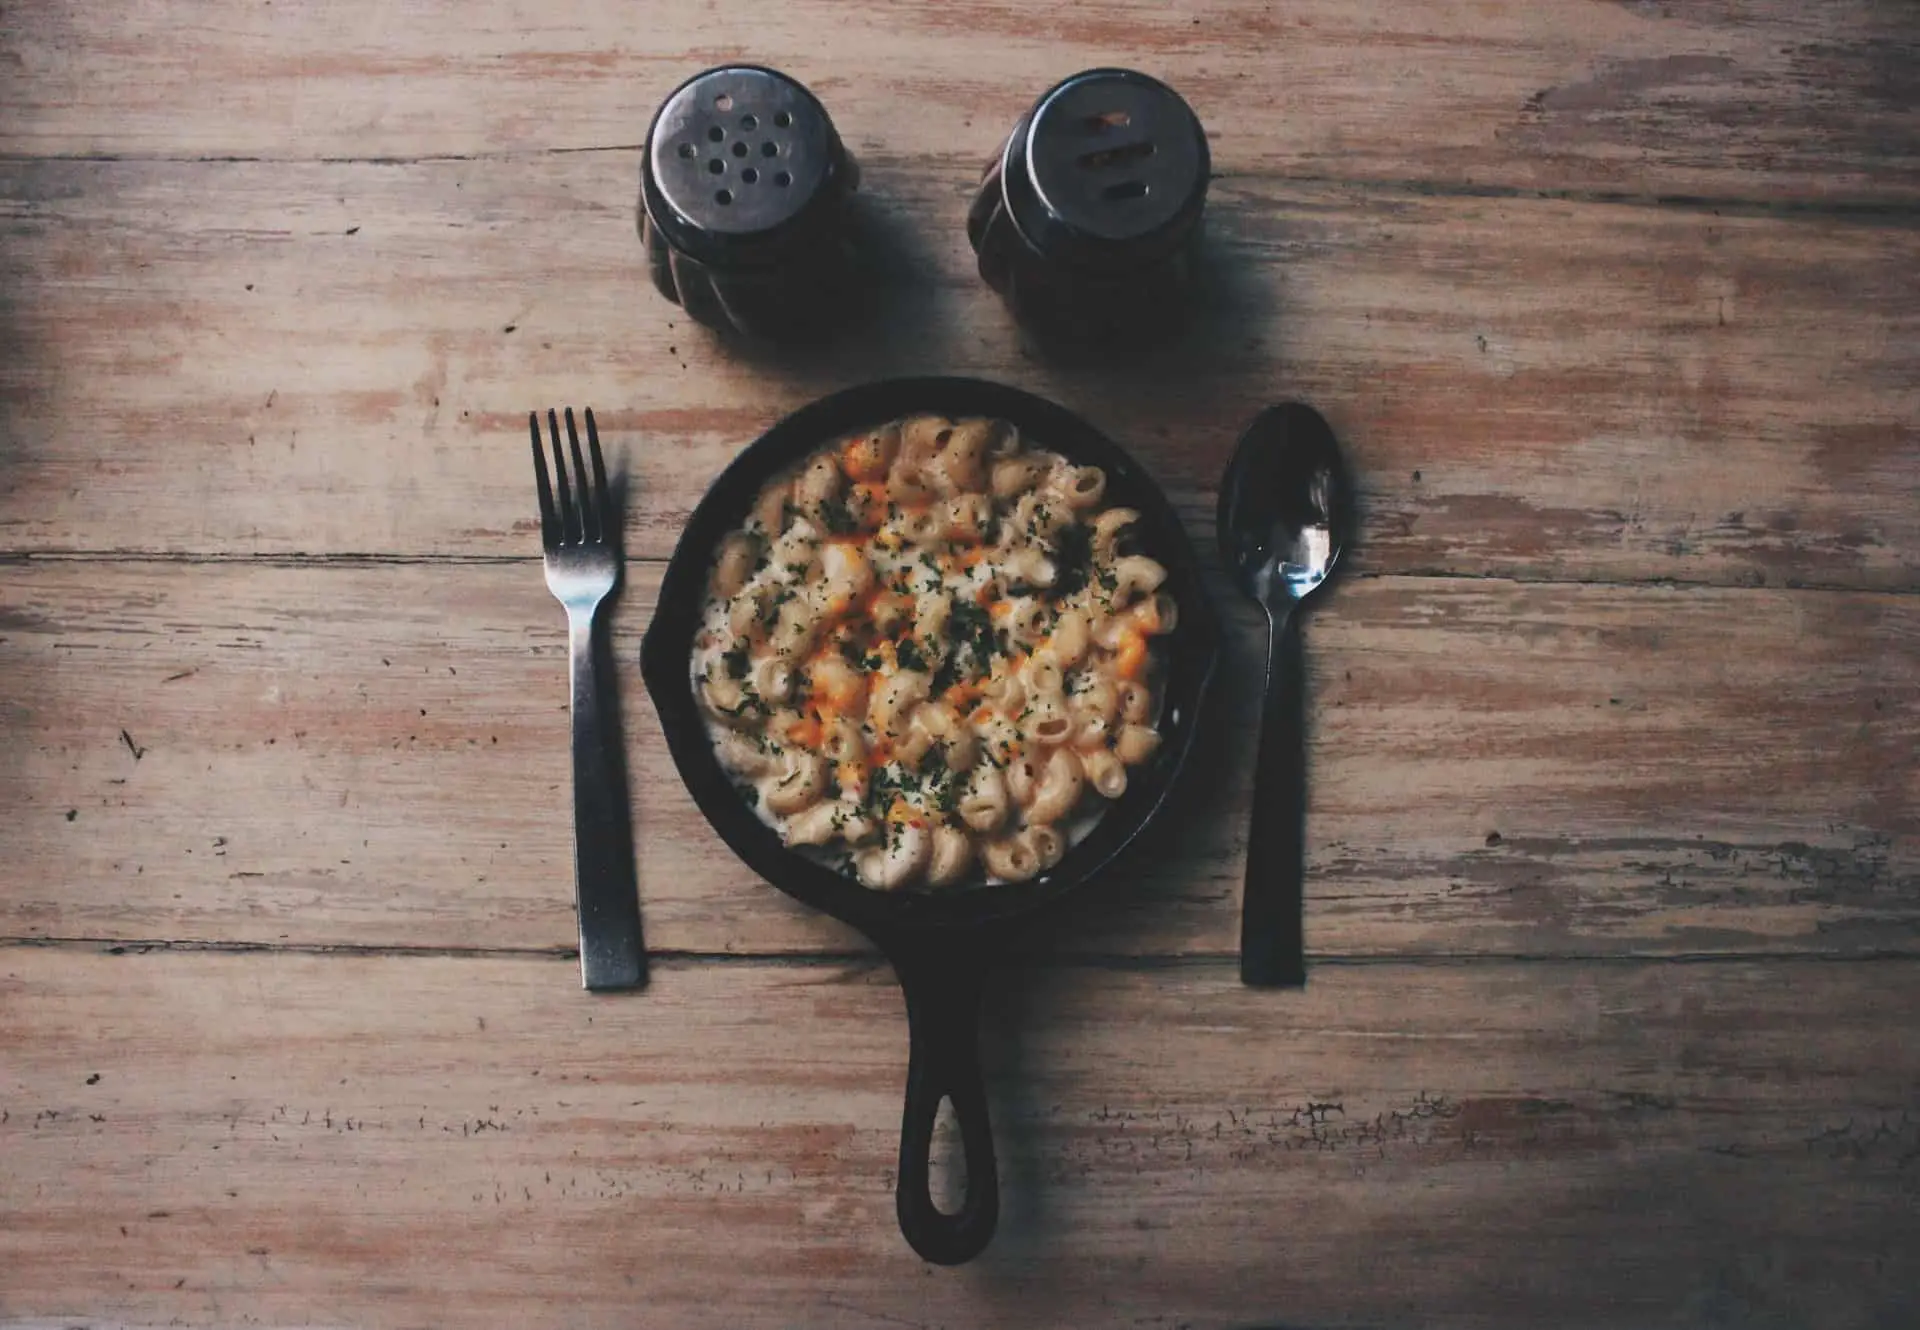
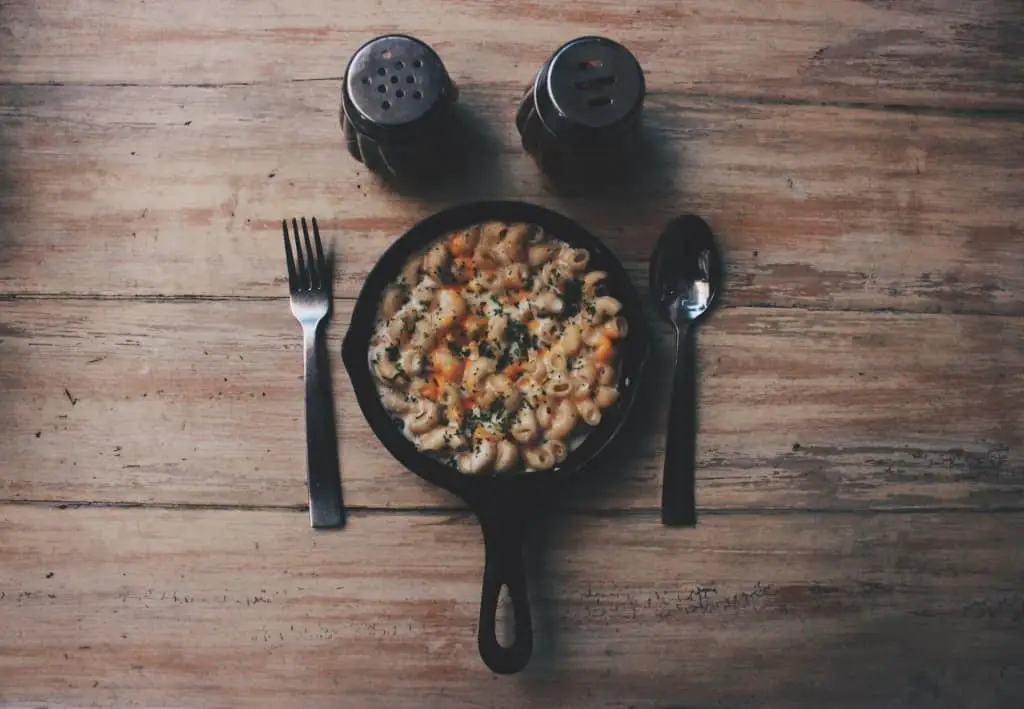
Finally, take the pizza slash mac and cheese out of the oven – can you smell it? Trust me, you’ll be completely taken over by that delicious smell, but don’t rush! It will be hard to taste anything if you burn your tongue. Let the meal cool for 15-20 minutes at room temperature while you prepare the table for dinner. If you have kids, this is not a meal that they’ll protest, so be ready for refill requests! Enjoy!


Prep Cooking time Total Servings
5 minutes 40 minutes 45 minutes 8

Ingredients

  • 1 box macaroni (ELBOWS)
  • 1 tsp olive oil
  • 1 onion (minced)
  • 3 tbsp all-purpose flour
  • 4 tbsp butter
  • 1 ½ cups (375ml) whole milk
  • 100g (4oz) of tomato sauce
  • 1 ½  cup shredded mozzarella cheese
  • 1 cup shredded cheddar or parmesan cheese
  • 1 tsp Italian seasoning
  • 1 package pepperoni slices (~100g)
  • A pinch of salt and pepper

Instructions

  • Cook the elbow macaroni in boiled water with a little salt and a few drops of olive oil for 8-11 minutes (depending on the package instructions).
  • When cooking is complete, reserve one cup of pasta water. Drain the macaroni and rinse them with cold water. Set aside.
  • Preheat the oven to 250°C (500°F).
  • Take the skillet, add olive oil, and let it heat over medium heat.
  • Add the onion and cook for a minute or two, then add the butter. When it melts, stir in the flour to create a roux. Be careful not to burn it – stir all the time.
  • Next, add the milk and let the mixture boil.
  • Stir in the tomato sauce, Italian seasoning, salt and pepper (to taste).
  • Finally, add one cup of the mozzarella cheese, macaroni, and half of the pepperoni slices. Mix everything well. If the sauce is too thick, use the pasta water to make it thinner.
  • On top, sprinkle the parmesan cheese, one layer or pepperoni slices, and the remaining mozzarella cheese.
  • Place the skillet in the oven until the cheese melts and starts to get brown (3-5 minutes).
  • When cooking is complete, leave it for 15-20 minutes at room temperature to chill.

Review: Zojirushi Home Bakery Breadmaker

Appliances Reviewed is reader-supported. When you buy through links on our site, we may earn an affiliate commission.
As an Amazon Associate I earn from qualifying purchases.

Do you get sick and tired of bread loaves that come out like a brick instead of a chewy, wonderful loaf? Does your current bread maker struggle to properly mix the dough on its own? Then you’ll love the design improvements that this Zojirushi bread maker will bring into your home! It offers two mixing blades instead of just one and the lid of the kitchen appliance is specifically design to reflect heat back into the loaf. This all comes together to create loaves of bread in about 2 hours for some recipes! All together, you can even save over $70 just by purchasing this item on Amazon.

What Are the Features of the Zojirushi Breadmaker?

The nicest features about this bread maker come from the home bakery aspects that are incorporated into the design. It bakes bread with ease, but you can make a number of other items in this kitchen appliance. You can make a number of different types of dough, from pizza to pretzels to cinnamon rolls. You can make cakes inside the baking pan and it’s able to even stir jams so you can enjoy preservatives all the time without preservatives.

There are these additional features to consider as well:

  • the design of the baking pan allows for a large traditional shaped loaf instead of the sometimes awkward vertical loaves of other bread makers;
  • there is an additional heater on the lid of this bread maker for more consistent loaves of bread; and
  • there are over 10 pre-programmed settings that can be used with this appliance, as well as the ability to choose up to 3 different crust shades.

Although the double paddles to create an extra whole in your loaf of bread and an extra place for your baked loaf to stick, the end results are worth the hassle this provides. You get a consistent baking experience every time.

Is There an Advantage With This Particular Kitchen Appliance?

Because this acts as a home bakery, there are a number of additional food products you can produce with this machine. The best, however, has to be the fact that you can make good quality gluten-free products within the baking pan or you can choose to create dough starters that you can later bake. Either way, you’ll have an easier baking process that will help you create stunning baked goods every day if you wish!

It’s difficult to find something bad to say about this bread maker. Some folks have had unpleasant experiences with them, but overall we saw a good result time and time again with this breadmaker. Take care of the pan as it does have a Teflon coating, so watch how hot the breadmaker gets. Otherwise we believe you’ll have an excellent baking experience and that’s why this kitchen appliance gets our recommendation.

Click here to view prices on Amazon and find the best deal on the Zojirushi Home Bakery Breadmaker.

Review: Panasonic Automatic Bread Maker

Appliances Reviewed is reader-supported. When you buy through links on our site, we may earn an affiliate commission.
As an Amazon Associate I earn from qualifying purchases.

Are you looking for an easier way to bake bread every day in your kitchen? Would you like a kitchen appliance that could do all of the work for you? With this Panasonic automatic bread maker, that’s exactly what you’re going to get! This kitchen appliance will not only knead the dough for you, mix in premium ingredients, and time the dough so that it will rise properly, but it will also automatically dispense the yeast at the proper time instead of putting it in with the butter products that can counteract the yeast sometimes.

With recipes for over 40 different types of bread and a 13 hour delay timer that makes planning a meal easy, you’ll be pleased to see that you could also save up to 27% off the MSRP by shopping on Amazon.

What Are the Features of This Panasonic Bread Maker?

The best feature that this bread maker is that it offers different settings for the different types of bread that you want to make. You can put it on whole wheat, multigrain, white, or even French bread and wind up with the right baking cycle for the bread you want. It even helps to make quick breads and cakes with ease if you have an immediate need for some baked goods!

There are also these additional features to consider with this kitchen appliance:

  • there are timing cycle features that include fruit and nut breads that allow for perfect ingredient insertion into the bread dough;
  • the motor behind the bread maker provides an outstanding 550 watts of total baking power that sits right on your counter; and
  • you’ve got up to 3 different loaf size settings and 3 crust darkness settings from which to choose when creating your next loaf of bread.

One of the best modes with this bread maker is the pizza dough mode. Instead of making a mess out of the kitchen, you can simply throw the ingredients into the bread maker and let it do the work! With the timer included, you can prepare in the morning and then roll out your completed dough when you get home from your errands.

Are There Any Advantages With This Particular Kitchen Appliance?

The one thing that we really loved about this particular bread maker is the fact that there isn’t a viewing window in the design of the device. This lets the bread cook more evenly because the heat is better reflected back onto the dough so you won’t end up with loaves of bread that are dense, thick, and about half the size they should be.

The one thing we did notice with this bread machine is that it would struggle to produce consistent loaves on repetitive cycles on the same day. Our recommendation would be to cook one loaf per day to take full advantage of what this kitchen appliance can do.

This bread maker really does make a good loaf of bread and over time this appliance will definitely pay for itself. We fully recommend this bread maker if you’re looking to have your home smell like fresh bread or you want to avoid the commercialized loaves that are available at the store.

Click here to view prices on Amazon and find the best deal on the Panasonic Automatic Bread Maker.

Bacon Egg Puff Pastry Breakfast Tart

Appliances Reviewed is reader-supported. When you buy through links on our site, we may earn an affiliate commission.
As an Amazon Associate I earn from qualifying purchases.

“a classic duo with an unforgettable taste”

Name a better breakfast duo than the infamous bacon and eggs! If pancakes come to mind, let me remind you that we’re taking a break from the sweet breakfast options, and instead, we’re focusing today on one incredibly delicious and creative twist to the most classic savory breakfast – bacon and eggs. One can argue that bacon and eggs are perfect on their own, but I like to experiment and try new flavors – this way, when I find something finger-licking good, I can share it with you guys. The bacon egg puff pastry breakfast tart turned out to be such a recipe.

It has bacon, eggs, cheese, and scallions for that sharp, sulfury taste. The pastry gives the meal an amazing pizza or pie quality, with incredibly crispy edges. This is why I love seasoning with oregano, but that’s totally up to your preference. You can use red pepper, cayenne, thyme, parsley, chili, garlic powder, and so on. I’m assuming you already know what you like on your plate, so feel free to adjust the seasoning to enjoy this breakfast tart even more.

Of course, maybe the most important question when it comes to breakfasts is – should you be an early bird to enjoy this meal? This bacon and egg pastry tart takes about 40 minutes from the time you begin preparing it to the time you eat it. However, the preparation time is only 10 minutes, which means you can let it bake while you get ready for the day.

To make the recipe, you’ll only need a baking sheet and the ingredients listed below.

The first step is to preheat the oven to (220°C) 425°F.

The second step is to prepare the pastry for baking. Lightly flour a baking sheet and roll the puff pastry sheet on it. The pastry sheet needs to be a little bit larger than the baking sheet so you can fold the edge and create a crust just like when making a pie.

After this, take a fork and poke a few hole throughout the center of the pastry to let the air out. This will prevent the pastry from rising during baking. Spread the cream cheese all over the center and brush the edges with the egg wash.

Place the baking sheet into the oven and bake for 15 minutes. Splitting the baking process into two parts is recommended because the pastry needs more baking time than the other ingredients. Plus, you’ll get a very crisp crust, with a soft and chewy center, which is perfect, right?

After 15 minutes, the pastry will get a light golden brown color, which is your signal to take it out of the oven and add the other ingredients.

First, spread the shredded white cheddar. You can also use parmesan, grana padano, or pecorino romano cheese, as they’re all very savory and hard-grating cheeses. Second, cut the bacon strips and place them over the cheese. On top of the bacon, crack the six eggs. Be careful not to crack the eggs one over another, but instead spread them throughout the tart, so they can cover the whole surface. Finally, add the diced scallions and season with salt, pepper, oregano, or anything that’s to your preference. Also, if scallions have a too intense flavor for you, chives are an amazing alternative with a milder taste.

I like to add raw spinach leaves over the tart because, at only 10 minutes or baking, they won’t dry out or be bitter, but instead will add a nice earthy flavor. If you’re a fan of spinach, I recommend you try this.

Return the baking sheet to the oven and continue to bake for another 10 to 15 minutes. The remaining time mostly depends on how well cooked you like your eggs. If you like them well cooked, leave the tart for 15 minutes. If you like them softer, bake for around 10 minutes.

Once the tart is baked, cut it into six equal squares and place one or two slices (depending on how much you think you can eat) on a serving plate and add your favorite sauce. Enjoy!


Prep Cooking time Total Servings
10 minutes 30 minutes 40 minutes 6

Ingredients

  • 1 sheet of puff pastry (thawed)
  • 1 cup shredded white cheddar
  • 6 eggs
  • 7 strips of bacon (cooked)
  • 1 egg wash (with 1 tbsp milk)
  • ½ cup of cream cheese
  • 1 tbsp diced scallions
  • 5-6 spinach leaves (optional)
  • 1 tsp oregano
  • A pinch of salt and pepper

Instructions

  • Preheat the oven to (220°C) 425°F.
  • Roll the puff pastry on a lightly floured baking sheet and fold the edges to create a crust.
  • Poke holes throughout the center od the puff pastry using a fork.
  • Spread the cream cheese over the puff pastry.
  • Brush the edges with the egg wash.
  • Bake for 15 minutes.
  • Take it out of the oven and toss the cheddar shreds over the pastry.
  • Cut bacon slices in half and place them over the cheddar shreds.
  • Crack the 6 eggs over the bacon slices.
  • Add the diced scallions.
  • Season with salt, pepper, oregano.
  • Place the spinach leaves on top.
  • Return to the oven and bake for another 15 minutes.

Homemade Doritos

Appliances Reviewed is reader-supported. When you buy through links on our site, we may earn an affiliate commission.
As an Amazon Associate I earn from qualifying purchases.

“the perfect company for every tv show, movie, or video game”

There are many ways you can make Doritos at home, but there are only a handful of recipes that can make homemade Doritos taste as good or even better than the real deal. I’ll toot my own horn and say that my homemade Doritos recipe is one of the crunchiest recipes out there with one-of-a-kind seasoning combination – which makes these Doritos practically irresistible.

I know I’m not the only one here when I say I don’t have control over myself when I’m eating chips. I just can’t stop, but then when I see the bag empty, I feel guilty! The additives, the number of calories… Oh, I’m getting a headache just thinking about it. So, making baked Doritos at home is one way to compensate for our control issues.

To make this recipe you’ll need half an hour, although your job in the kitchen is no more than 10 minutes. It’s a really easy-to-follow recipe that anyone can master.

You’ll need a baking dish, a mixing bowl, a saucepan, and all the ingredients listed below. Keep in mind that when it comes to seasoning, you can always add or remove some of the ingredients to better suit your taste.

To start, preheat the oven to 180°C (350°F).

While the oven heats, take a large mixing bowl and combine the tomato powder, chili powder, smoked paprika, garlic powder, and salt. Stir until all of the ingredients are well mixed. Set it aside.

After this, take a baking sheet, line it with parchment paper, and grease it with cooking oil. Set it aside.

Take the tortilla wraps and stack them in a pile. Using a big knife or a pizza cutter, cut the tortillas into three strips, then use zig-zag movements to cut each strip into small triangles.

Now that everything is ready, take a tortilla triangle, brush it with vegetable oil on both sides, then toss it into the bowl with seasonings until fully covered. After this, place it in the baking sheet.

Repeat the same process with the rest of the tortilla triangles. Once you get the hang of it, it’s a really fast process. The only thing you need to keep in mind is that the triangles shouldn’t overlap in the baking sheet, so they can bake completely and end up really crunchy.

When you’re done, simply place the baking sheet in the oven and bake for 20 minutes. Keep an eye on your Doritos, as you don’t want to burn them.

When they’re baked, take the tortilla chips out of the oven and leave them at room temperature so they can cool completely.

To resist the temptation to eat them while still hot, keep yourself busy with the cheesy dip that goes hand in hand with Doritos.

To make it, take a saucepan, place it over medium heat and stir in the half-and-half and corn starch. After a few minutes, when the mixture gets smooth, reduce the heat and fold in the cheese. Stir for a minute or two and remove from heat when the cheese melts.

Transfer the dip into a serving bowl and serve together with the cooled Doritos.

Enjoy them over your favorite TV show or a small gathering with your close friends and family!


Prep Cooking time Total Servings
5 minutes 20 minutes 25 minutes ~ 50 pieces

Ingredients

  • 5-6 corn tortillas
  • Vegetable oil
  • 1 cup half-and-half (half milk/half cream)
  • 1 cup cheddar cheese (grated)
  • 1 tbsp corn starch
  • 2 tsp dried tomato powder
  • 1 ½ tsp chili powder
  • 1 ½ tsp smoked paprika
  • 1 tsp garlic powder
  • ½ tsp salt

Instructions

  • Preheat the oven to 180°C (350°F).
  • Take a large mixing bowl and combine the tomato powder, chili powder, smoked paprika, garlic powder, and salt. Stir well, until all of the ingredients are well combined. Set aside.
  • Stack the tortilla wraps in a pile and cut them into four stripes. After this cut each stripe into triangles using zig-zag movements.
  • Take a baking sheet, line it with parchment paper, and spray with cooking oil.
  • Brush a triangle with vegetable oil on both sides, then toss and turn into the bowl with mixed seasonings until fully covered. Finally, place it on the baking sheet.
  • Repeat the same procedure with each tortilla triangle. Be careful not to overlap the triangles in the baking sheet.
  • Place the baking sheet in the oven and bake for 20 minutes.
  • Check the chips every five minutes – make sure they don’t burn.
  • After baking, let the tortilla chips cool at room temperature for at least 20 minutes.
  • Meanwhile, make the cheese dip.
  • Take a saucepan and stir in the half-and-half with the corn starch.
  • Place the saucepan over medium heat and stir until the mixture boils.
  • Once the mixture is smooth (4-5 minutes), reduce the heat and stir in the cheese.
  • Cook for a minute or two until the cheese melts completely.
  • Transfer the cheese dip into a small serving bowl and serve together with the freshly made Doritos.

How to Keep Fried Food From Getting Soggy

Appliances Reviewed is reader-supported. When you buy through links on our site, we may earn an affiliate commission.
As an Amazon Associate I earn from qualifying purchases.

We’re all passionate consumers of fried foods, whether we’d like to admit it or not. Donuts, fried chicken, churros, french fries, whatever the delicacy is, they’re the best when they’re fresh out of the fryer.

But sometimes, you’re left with a bunch of soggy leftovers, remnants of your crispy dinner the previous night, and other times, the takeaway dish turns into a sad mess in just 5 minutes, which isn’t very appetizing. In some cases, even when just a couple of minutes out of the fryer, fried foods can lose the crunch and transform into a disaster if not stored properly.

Fortunately, there are some neat tips and tricks that we’ve learned to keep that satisfying crunch alive a bit longer, so keep reading to find out the best ways to keep that crunch crunching.

Why Fried Food Gets Soggy in the First Place

When fried food is taken out of your home fryer, most of it is full of steam. The food is piping hot, moist on the inside, and crispy on the outside. That excess moisture inside will evaporate in the form of steam and turn into the water if there’s nowhere else to escape. In other words, if you pack it in an airtight container, as many of us do when we’re in a rush.

The key to keeping fried foods crispy after removing them from the fryer is finding a way to ventilate that excess steam. If the fried food isn’t properly ventilated, the steam will cause all that crispy goodness to become soggy and unappetizing.

In plain terms, water and heat are the main enemies of crispy foods. The best way to keep the crunch crunching is to cool the food down while not allowing the steam to turn into water on top of the crispy layer and ruin it.

Learn From the Crispy Food Masters

Before you’ve cooked your own fried food, you must have visited some well-known crispy food restaurants for a dine-in or a takeaway meal. Well, the emphasis is on the takeaway meal. During our research, we visited crispy fried food specialists like KFC and Popeyes and looked at their delivery methods.

KFC delivers their meals in cardboard buckets with holes on top to let out the steam coming from their famed Kentucky fried chicken, while Popeyes uses cardboard boxes with big holes on every side. These packaging methods make good use of two important factors – ventilation and absorption.

Ventilation

When fried food leaves the fryer, it releases moisture in the form of steam, so it’s very important to make sure there’s space for it to escape and not condense and turn into water.

So, let’s say you’re making tomorrow’s dinner and frying something tasty. The best way to prevent your fresh-out-of-the-fryer crispy food from getting soggy is to place it on a cooling wire rack until it has cooled off instead of sealing it in a container while it’s still hot.

If you absolutely have to pack it while steaming hot, it’s best to use a container with holes. The smell of fried food might fill your car or your fridge with its unmistakable aroma and make you salivate, but it will be worth it when you finally taste the goodness.

Absorption

Absorption plays a key role as well when it comes to perfect crispness. When you remove your food from the fryer, it’s best to lay it on top of some paper towels or even a kitchen cloth. If you want to take your food on the go, you can place paper towels on the bottom of your ventilation container.

Why is this recommended? Well, since the moisture from the hot food will condense on the sides of your container, you need something to absorb the unwanted moisture and prevent it from making the edge of your crisp soggy, and a paper towel does just that. Remember, better to have a soggy paper towel than soggy fried food.

How to Actually Keep Fried Food From Getting Soggy

Now that you’ve learned what the fried food giants do to keep the crisp crisping, let’s see some other methods for preventing your next meal from getting soggy.

Cooling Mechanics

Fried food doesn’t get soggy when it’s reasonably cooled down before it’s stored in any container. If you need to take crispy fried food on the go, the best way is to let it cool on a rack for at least half an hour before putting it in a container. The cooling mechanics will not allow steam to form on the crispy bits, and you can always reheat crispy food when you’ve reached your destination.

Heated Containers

One way to keep crispy food fresh at home can be by placing it on a wire rack and keeping it in the oven on low heat. When you’re on the go, though, this effect can be emulated in your container by placing a pizza stone or some other passive heating item. The pizza stone combined with a well-ventilated container lined with paper towels or cloths will ensure that your fried food will stay warm and crispy wherever you take it, like your office, for example.

Just imagine how stunned your coworkers would be when you whip out a piece of fresh, hot, and crispy chicken for lunch despite the long trip from home. Well, it’s a secret only you know!

Preventing Soggy Takeout Food

Many places that serve fried takeout food will most likely pack it in a styrofoam container. The styrofoam container is great for keeping food warm, but it makes it soggy in just a couple of minutes. If you’re planning to order takeaway, it’s best to invest in  vented Tupperware container. It’s not the most practical solution, but it’s perfect for preserving the crispiness.

With that being said, vacuum-sealed containers should have no business with hot crispy food. Remember our trick with the paper towels on the bottom? Exactly! It’s to ensure that the crispness stays intact, so make sure to do this. Tupperware containers are also a great choice as they don’t pollute the environment like single-use styrofoam containers that soggy up your food.

Wrapping Crispy Food

If you’ve prepared different fried foods like french fries, onion rings, and a couple of churros for the sweet tooth but only have one container, then you have no choice but to wrap them up separately. Wrapping food is a great way to separate fragrances and flavors, but the most common mistake you can make is to wrap your food too tightly.

There is a common misconception that wrapping food tightly will keep it warm and fresh, and while it’s true to some extent, it doesn’t apply to crispness. If you want to retain that crispy edge and moist center, you must wrap your food very lightly. Tight wraps only seal the moisture inside the food, and after a few minutes, you’ll end up with multiple soggy dishes. Wrap the food lightly, and make sure you use a vented container. Cooling your fried food for a couple of minutes before wrapping will also help you retain a crispy bite

Following that, most people make mistakes when choosing the wrong wrapping material. Plastic or aluminum-based wrappers can create moisture that will soggy up your crispy food in no time. They are great for retaining heat but not so good at retaining a crisp. As we mentioned before, crispy food can be reheated but not de-soggyfied, so if you want your crisp to last, you should only wrap crispy foods in paper wrappers.

The Way to Keep Fried Food Crispy

Like it or not, the best way to enjoy your fried foods is to eat them fresh out of the fryer while they’re still crispy. Fresh crispy food is a delight to eat while it’s sizzling, but sometimes we don’t have the luxury of time, and we have to take our food on the go or store the leftovers for the following day.

Storing is crucial for keeping the crisp from becoming a soggy mess, so remember to store your food in ventilated containers lined with paper towels or kitchen cloths to keep the moisture away from the crispy bits.

Whatever you decide to do, keep in mind that crispy food can be reheated, but there is no way to get that crisp back if it becomes soggy. If you keep to our guide on perfectly retaining a crispy bite when transporting or storing crispy food, then you’ll bite into a satisfying crispy piece of food.

what kind of a container is this?

Plastic container with vents to let the steam out.

What Is Italian Sausage Made Of?

Appliances Reviewed is reader-supported. When you buy through links on our site, we may earn an affiliate commission.
As an Amazon Associate I earn from qualifying purchases.

If you find yourself on a vacation in Italy, it’s not very likely that you’ll find the term ‘Italian sausage’ on the restaurant menu. You may simply see a ‘salsiccia’ on the menu, although, there are many different types on Italian menus. However, if you’re looking for a place to eat a delicious sausage somewhere in the cities of North America, you may find yourself intrigued by a special type of pork sausage, commonly referred to as ‘the Italian sausage’.

This type of sausage is also known as ‘Sweet Italian Sausage’, ‘Mild Italian Sausage’, but also ‘Hot Italian Sausage. The terms ‘sweet’ and ‘mild’ you may use interchangeably, as they usually refer to the same type of Italian sausage.

In most cases, we are talking about a pork sausage made with anis, fennel seeds, and in the case of hot sausage, some hot spice is expected as well (e.g. minced hot peppers), according to preference.

If you’re an Italian food lover, you must have run into this type of sausage when ordering pasta, pizza, and many other meat-containing Italian dishes.

Also, if you have a recipe that requires a hot Italian sausage, but you have only found the mild/sweet one, all you need to do is add some crushed pepper, chili, or minced hot paprikas, and you’re good to go.

If you find yourself in Italy, and there is a ‘sasiccia fresca’ or ‘fresh sausage’ offered in the restaurant or supermarket, and if its primary seasoning is with fennel, you can rest assured that you are dealing with Italian sausage.

History of the Italian Sausage

This may be a bit unexpected, but the evidence of the Italian sausage as we know it today dates back all the way to the 1st century before Christ.

The recipe and the dish were first described by the Roman historian Marco Terenzio Varrone. Thanks to him two thousand years later, we are still able to enjoy this delicious meal. And the best part is that today it’s not only available and known in Italy and countries that previously belonged to the Roman Empire, but everywhere in the world.

In his writings, Varrone called this delicates dish ‘lucanica’. It is possible that the sausage was previously called also ‘luganega’. Lucanica is how the Roman soldiers who were the first ones to learn how to prepare it, used to call it. Lucanica was a dish made of minced meat that was packed into a case and well seasoned. According to Martial and Cicero, the sausage was named by the region of its origin – the Italian Lucania.

In the US, thanks to the rich cultural mix in most parts of the country, along with the people migrating from Italy, came also the famous Italian sausage… and since it’s so good, it stuck around for quite some time.

Now, let’s dive a bit deeper into the topic: what is this sausage made of exactly, and is it possible for you to make it at home?

What Is Italian Sausage Made Of?

Making an Italian sausage at home is possible, as it doesn’t require any kind of special machinery. Of course, everything is much easier to make with industrial machines, however, it’s also less tasty, and you have no control over the ratio of ingredients as you have when you’re preparing your food at home.

However, stuffing sausages at home can be quite demanding, so many people prefer to avoid going through all the trouble, and simply purchase them at the local shop. On the other hand, if you are buying bulk sausage from your local butcher or you plan to use crumbled meat from a casing to prepare a dish, you can simply buy ground pork too and season it with your own seasoning.

The original Italian sausage usually contains:

  • Fennel (but also ground fennel seeds);
  • Parsley;
  • Onion;
  • Basil;
  • Crushed red pepper;
  • Garlic;
  • Oregano;
  • Sweet paprika;
  • Salt;
  • Black pepper;
  • Dried thyme;
  • Anis;
  • Red wine vinegar.

A good thing about the Italian sausage is that you don’t have to use all the ingredients if you don’t like something. Even if you lose an ingredient or replace some of them, it will likely preserve its original taste.

If you don’t want to bother with buying each of these ingredients individually, you can for sure find an ‘Italian seasoning blend’ in your supermarket, buy a few bags of those, and take a shortcut.

Also, if you don’t consume pork meat, you can still prepare the Italian sausage using others types of meat, such as chicken, or cow. The secret is in the seasoning and the spices, so although the type of meat does change the taste of the dish, it’s not crucial for it to be pork.300

For achieving the best results with your Italian sausage, we strongly recommend purchasing the ingredients from the local fresh market.

For example, it’s really important that you find some fresh fennel, as this celery-like vegetable from the carrot family can taste really bad otherwise. The same goes for sweet paprikas, as these are the richest with flavor if they are organically grown and fresh.

When it comes to parsley, it’s always nicer to use fresh leaves, however, if you can’t find any, dried leaves will do the trick too. For those of you who are sensitive or dislike the strong taste of garlic, you can either put less fresh garlic or use the dried ones. Red wine vinegar is optional.

The process of preparing is something that not everybody likes to do. You basically need to knead the pork meat with red wine vinegar and the spices, until it’s evenly distributed through the sausage.

You can add the spices according to your preferences, and simply use more of what you like to taste.

After you’re done with the kneading, you should split the sausage into three pieces, and wrap them in plastic foil. Then, you can either freeze them or store them in the fridge before use.

Another option is to smoke the sausages. To do this, you need to separate the meat pieces to make sure that the air will circulate between them. This is why you can often see meat hanging from a rack when being dried. If you don’t have the conditions for this way of drying, you can also put them on a grill and smoke them for a couple of hours at 100 degrees Fahrenheit, and then slowly increase the heating. The final internal temperature of the sausage should be around 165 degrees Fahrenheit.

How Can I Use the Italian Sausage?

The Italian sausage is actually surprisingly versatile when it comes to different ways you can combine it in your home cuisine.

One way to use it is to add it to a soup, along with other vegetables such as potatoes, carrots, celery, or anything else you like to put in a soup. The sausage should give a very nice aroma to the soup, and thanks to it being well-seasoned, you don’t have to bother too much with the spices.

Another way to use it is to put it on a pizza and mix it with other common pizza ingredients that you like.

Of course, you can also frill the sausage, and eat it with a fresh bun, pita bread, or in a tortilla, combined with some fresh vegetables such as cherry tomatoes, lettuce, cucumber, fresh onions, and sauces of your choice.

Other options are to simply mix the sausage meat with eggs, mix it with pasta, or simply eat it fried. It mixes well with all kinds of red sauces and stews as well.

Conclusion

Italian sausage is one of the go-to dishes when you’re not sure what to make and you don’t want to put in too much effort, while still getting an excellent and tasty meal as a result.

The long history and tradition of this simple dish make it an interesting option when you’re having guests, as there’s also a story to tell about the (at least) two thousand years old sausage recipe.

The main benefits of the Italian sausage are that it’s very straightforward to prepare, the ingredients are usually available regardless of where you live, and it tastes amazing – there’s hardly anyone who wouldn’t enjoy it.

The dish is very well mixed with all kinds of foods: leftovers of cooked vegetables, soups, fresh salads, cream salads, stews, but it also combines well with a simple bun.

Although it’s not recommended to eat such heavy food for breakfast, from time to time it is quite delicious to combine it with your morning scrambled eggs and season with some rocket and cherry tomatoes.

Join Our Newsletter

Never miss a thing! Our newsletter is the perfect way to stay informed about the latest recipes and reviews that we publish.