Single Serving Carrot Cake Mug

Appliances Reviewed is reader-supported. When you buy through links on our site, we may earn an affiliate commission.
As an Amazon Associate I earn from qualifying purchases.

“sometimes a bite-size sweet delight is all you need”

Do you remember the last time you tasted rich-flavored and exquisitely moist carrot cake? Yes, memories like that make our mouth water, but who has the time to make a whole carrot cake anytime a craving kicks-in? It’s so impractical and what about our health and weight?

Leaving big cakes for birthdays and special occasions only, the perfect answer to all these worries is this little single-serving carrot cake in a mug! It takes less than 5 minutes, and barely any effort, yet it will satisfy your sweet tooth. Plus, you can’t overeat when you only have cake for one, right?

Aside from the practical reasons, I personally love making this single-serving carrot cake mug because the mug keeps it warm, adding to its moisture. The outer layer is a little crunchy, so when you add the cold vanilla icing, it becomes pure heaven for the taste buds, which is a little bit weird as I never thought I would say vanilla and carrots taste like heaven.

I know that when I first heard about a carrot cake it didn’t make any sense. Why would someone put carrots in a cake, what would that taste like? But, if you’ve ever made a carrot cake, then you know carrots make the dough incredibly soft and moist, unlike the drier brownie-dough, while the subtle flavor of the carrots is completely overpowered by the cinnamon, nutmeg, and the caramel scent of the brown sugar. And, here’s how to make it!

The only thing you’ll need for this recipe is a microwave-safe mug, a small mixing bowl for the icing (optional), and the ingredients listed below. The whole procedure is a piece of cake, or in this case – a mug of cake!

If you’re going to make the icing, then my suggestion is to start from there. It will take you like a minute or two to make it, but you can let it cool in the fridge while you make the carrot mug cake. This way when you’re ready to serve it, the cold icing will give a nice contrast to the warm cake.

Start by mixing in the milk, powdered sugar, and vanilla extract in a small mixing bowl. Use a hand mixer, or whisk it by hand until you get a creamy consistency. If you like the icing to be a little bit thicker and creamier, use more powdered sugar. Once you’re happy with the density of the icing, let it cool in the fridge.

The next step is to mix the ingredients for the mug cake. Use the mug directly, or take another small mixing bowl and whisk together the flour, baking powder, brown sugar, cinnamon, nutmeg, and allspice. Once the ingredients are well combined, stir in the wet ingredients – the milk, vanilla extract, and oil. Finally, add the grated carrot and mix the blend again. If you used a mixing bowl, transfer the mixture into the mug and place it in the microwave. I like to add a muffin liner for presentation, but you don’t have to. Let the cupcake cook for about 3 minutes on a low setting (30% power).

Once the little mug delight is ready, leave it at room temperature for another minute or two to cool down. Don’t give in to the temptation just yet! It’s a lot better when it’s not burning hot and when it’s covered with the delicious vanilla icing. So, after the carrot mug cake is a little bit chilled, pour the icing over and serve! Enjoy!


Prep Cooking time Total Servings
2 minutes 3 minutes 5 minutes 1

Ingredients

For the carrot cake:

  • 1 small finely grated carrot
  • ¼ cup all-purpose flour
  • ½ tsp baking powder
  • 1 tbsp brown sugar
  • ¼  tsp cinnamon
  • ¼ tsp nutmeg
  • ¼ tsp allspice
  • ½ tsp vanilla extract
  • ¼ tsp unsalted butter (melted)
  • 1 tbsp olive oil (optional: coconut, almond, sunflower oil)
  • 2 tbsp milk

(Optional) For the icing:

  • ½ cup powdered sugar
  • 2 tbsp milk
  • ½  tbsp vanilla extract

Instructions

  • Take a small mixing bowl and combine all the ingredients for the icing – the milk, powdered sugar, and vanilla extract. Stir well until you get a creamy consistency, then place the mixture in the fridge.
  • Take the mug and grease it with oil or butter.
  • Whisk together the flour, baking powder, brown sugar, cinnamon, nutmeg, and allspice inside. Stir well until all the ingredients are combined.
  • Add the vanilla extract, oil, and milk. Stir again until you get a smooth mixture.
  • Fold in the carrot. Mix again.
  • Place the mug into the microwave and cook on a low setting (30% power) for 3 minutes.
  • When done, leave it at room temperature for 2-5 minutes, to cool.
  • Before serving, pour the icing over the carrot cake and sprinkle some cinnamon.
  • Serve and enjoy!

Single Serving Blueberry Muffin Mug

Single Serving Blueberry Muffin Mug

Appliances Reviewed is reader-supported. When you buy through links on our site, we may earn an affiliate commission.
As an Amazon Associate I earn from qualifying purchases.

“one muffin a day keeps the stress away”

Single Serving Blueberry Muffin Mug

Working days and busy schedules can be quite a challenge for our meal plan, let alone leave us time to prepare and enjoy a dessert, right? Well, no, because when our devotion to sweet things is put to the test, we adapt and create something like this yummy single serving blueberry muffin mug! It’s the perfect quick delight when you don’t have time to get messy in the kitchen.

It’s incredibly rich in flavor – sweet, yet with a touch of savory to really stimulate your taste buds and make you eat it in a heartbeat. I’m not kidding – one minute you’re taking it out fresh from the oven, and it’s gone the next!

The muffin base is a little drier than cookie dough, but nevertheless very sweet and tender, which is why blueberries are perfect ingredients for muffins. They have a slightly sweet taste with just a touch of acidity. It’s when you bite the muffin that you’ll feel a pleasant “squirt” of juice that really makes you lick your lips in anticipation of the next bite.

Okay, my mouth is already watering, so let’s get down to business. To make this single serving blueberry muffin mug, you’ll need no more than 15 minutes in total, one oven-safe mug or bowl, another mixing bowl, and the ingredients listed below. Now, you may have noticed some of the ingredients are optional, and you can add them or leave them out depending on your personal preferences. For example, I love to sprinkle some lemon zest over my muffins because it enhances that slight acidity from the blueberries, which I adore, especially in my chocolaty deserts. However, if you’re not the person for it, no worries, you can totally skip it!

The first thing you want to do is preheat the oven. I know I usually forget to turn it on when I start preparing my meals, so here’s a friendly reminder! For baking muffins, I’ve found that 180°C (356°F) is the perfect temperature.

Next, take an oven-safe mug or bowl to mix in the dry ingredients for the muffin base – the flour, baking powder, brown (or regular) sugar, salt, and vanilla. Once the ingredients are well-combined, stir in the milk, olive oil, and butter (if you’re using). Butter makes the muffins more tender and moist, and it gives them a more familiar taste, but if you want a lighter dessert, that’s okay. Make sure the butter is well-melted before leaving the mug on the side to make the topping.

Take another mixing bowl and briefly beat together the flour, sugar, olive oil, and coconut flakes. When you get the right consistency, you can the mixture to the mug. But before you do that, first take the blueberries and add them over the muffin. Now, apply the topping over the blueberries.

Sprinkle lemon zest, or maybe chocolate chips (optional).

Place your mug in the preheated oven and let it cook for around 10 minutes.

Remember, it’s going to be very hot when you take it out, so use a protective pad to save your countertop! Finally, let the muffin cool off before eating it. That’s a perfect time to brew a nice cup of tea to enjoy with this muffin.

Considering that a typical oven can easily fit four mugs, you can make blueberry muffin mugs for your whole family or for when your friends when they come to visit and you want to surprise them with something sweet!


Prep Cooking time Total Servings
5 mins 10 mins 15 mins 1

Ingredients

For The Muffin: 

  • ¼ cup flour
  • ¼ tsp baking powder
  • 1 tbsp brown sugar
  • 2 tbsp milk (optional: plant-based)
  • 1 tbsp olive oil
  • 30-50g blueberries
  • A pinch of salt
  • A pinch of vanilla extract or powder
  • Optional: 1 tbsp butter

For the Topping:

  • 1 tbsp flour
  • 1 tbsp sugar (optional: powdered sugar)
  • 1 tbsp olive or almond oil
  • ½ tbsp coconut flakes
  • Optional: lemon zest

Instructions

  • Preheat the oven to 180°C degrees (356°F).
  • In a small oven-safe bowl or mug, mix together the dry ingredients: flour, baking powder, sugar, salt, and vanilla powder.
  • While stirring, add the milk, olive oil, and butter (if using). Make sure the butter is well melted, then set aside.
  • In another bowl mix in the flour, sugar, olive oil, and coconut flakes to make the topping.
  • Add the blueberries in the mug, then spatter the topping over the blueberries.
  • Place the mug in the oven and cook for 10 minutes.
  • Remove the mug carefully and let it cool at room temperature before eating.

Enjoy the muffin as a breakfast treat before starting your workday, or even better – surprise your kids and be a real supermom!

The Best Tea Infuser

Appliances Reviewed is reader-supported. When you buy through links on our site, we may earn an affiliate commission.
As an Amazon Associate I earn from qualifying purchases.

Infused tea, teapot and brown sugar next to each other on beech wood, shot from top

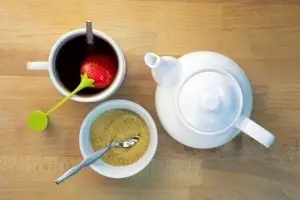
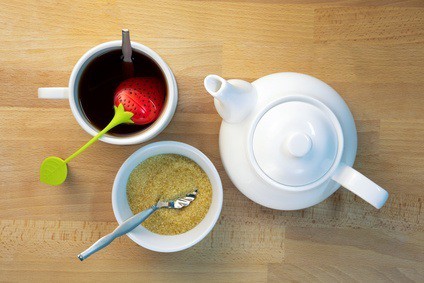
When it comes to making a cup of tea, some people grab a tea bag or a spoon of instant powder, which tea lovers will strongly disapprove of. Since tea is meant to be enjoyed, brewing an absolutely awesome cup of tea is something that only a tea infuser will be able to do. If you’re nitpicking, you may also note that not all tea infusers are up to the task. So, how to find the best tea infuser – one that delivers an unforgettable taste?

While there are a number of tea infusers available on the market today, we made sure to hand-pick only the cream of the crop and give you honest reviews about each product.

Keep reading to find out why these four tea infusers earned “the best” spot in our list and how they can match your specific tea brewing needs.

Don’t forget to also check out our essential buying guide at the end of the article, where we share the most important tips you need to know when shopping for the best tea infuser.

The Best Tea Infuser

Best Overall
Best Quality
Best Spoon And Ball
Best For Travel
Genuine Fred MR. TEA Silicone Tea Infuser
Adagio Teas ingenuiTEA Bottom-Dispensing Teapot,clear,16 oz
OXO BREW Twisting Tea Ball Infuser
Contigo West Loop Stainless Steel Vacuum-Insulated Travel Mug with Spill-Proof Lid, Keeps Drinks Hot up to 5 Hours and Cold up to 12 Hours, 16oz Steel/Black
Features: 3.25 x 4.75 x 1.75 inches, single-serving type, BPA-free silicone, dishwasher and microwave safe, a variety of fun designs.
Features: 5.25 x 4 x 6.5 inches, 16 oz serving, tritan BPA-free plastic, 3.5" diameter.
Features: 4.48 x 1.4 x 10,51 inches, single-serving type, stainless steel, twisting feature, dishwasher safe.
Features: 16.0 ounces, BPA free, vacuum insulation (hot up to 5 hours and cold up to 12), 24 colors, auto seal technology.
Best Overall
Genuine Fred MR. TEA Silicone Tea Infuser
Features: 3.25 x 4.75 x 1.75 inches, single-serving type, BPA-free silicone, dishwasher and microwave safe, a variety of fun designs.
Best Quality
Adagio Teas ingenuiTEA Bottom-Dispensing Teapot,clear,16 oz
Features: 5.25 x 4 x 6.5 inches, 16 oz serving, tritan BPA-free plastic, 3.5" diameter.
Best Spoon And Ball
OXO BREW Twisting Tea Ball Infuser
Features: 4.48 x 1.4 x 10,51 inches, single-serving type, stainless steel, twisting feature, dishwasher safe.
Best For Travel
Contigo West Loop Stainless Steel Vacuum-Insulated Travel Mug with Spill-Proof Lid, Keeps Drinks Hot up to 5 Hours and Cold up to 12 Hours, 16oz Steel/Black
Features: 16.0 ounces, BPA free, vacuum insulation (hot up to 5 hours and cold up to 12), 24 colors, auto seal technology.

Best Overall: Fred & Friends MR. TEA Silicone Tea Infuser

Genuine Fred MR. TEA Silicone Tea Infuser
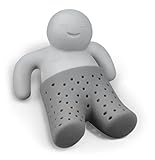
We chose the Fred & Friends MR.TEA silicone tea infuser as our best overall pick, as the product is cute and fun, very easy to use and maintain, and steeps evenly. It’s a good choice for most people because it can definitely deliver an incredibly delicious cup of tea.

Pros:

Fred & Friends is a very reputable and popular brand that creates innovative and fun tea infuser’s designs. You can choose from Mr. Tea, Manatea, sloth, whale, and so much more. It’s practically impossible to be moody or sad drinking tea when a cute sloth is hanging from your mug. Grown-ups enjoy the adorable designs, too, but kids are especially enthusiastic about them. Therefore if you have kids, this is the right tea infuser for you.

Aside from its pleasing appearance, the Fred & Friends MR. TEA infuser grips strongly to the side of a mug and always stays cool in hot water. You will never burn your fingers, nor have problems with the insider falling inside the mug.

It is important to note that the Fred & Friends MR. TEA infuser steeps evenly, so you can enjoy a consistent flavor from the first sip to the very last one.

Finally, the unit is dishwasher and microwave safe. It can’t get any more convenient than that! Once you’re done drinking your tea, simply open the infuser, throw away the used leaves, and place it in the dishwasher. That’s it.

Cons:

When it comes to the concerns, we’ve noticed that sometimes leaves can get stuck inside the infuser. This can be a little annoying, as you’ll have to go out of your way to thoroughly clean the infuser.

Another disadvantage is that the product is not suitable for larger quantities of tea. It’s a single-serving type of infuser, designed to fit in one mug. People who need a larger tea infuser can check out our next recommendation – the Adagio Teas ingenuiTEA teapot.

The Verdict:

Silly design, fair-price, and great taste are just some of the characteristics that made us choose Fred & Friends MR. TEA infuser as our best overall choice. The unit is great for everyone, small or big, and we guarantee it will make your cup of tea even more enjoyable.

Best Quality: Adagio Teas ingenuiTEA Teapot

Adagio Teas ingenuiTEA Bottom-Dispensing Teapot,clear,16 ozTea masters need something bigger and more serious than the previously discussed single-serving tea infuser, which is were the Adagio Teas ingenuiTEA Teapot truly shines. It’s a lot larger and features a bottom-dispensing mechanism, making tea drinking even more practical. The unit is a high-quality tea infuser meant to handle the needs of a tea party.

Pros:

While most infusers are designed for single-serving, this teapot can hold up to 16 ounces of liquid, which is great news for people that drink a lot of tea. You also have the option to choose the 28-ounce version, which is available on the same purchase link. If your whole family are passionate tea drinkers, then this will come quite handy.

Another handy feature is its bottom-dispencing mechanism, as you only need to place it above your cup in order to fill it.

The Adagio Teas ingenuiTEA teapot is made from strong, BPA-free plastic, which makes the device completely safe.

As a great representative of its type, the teapot is spacious, which allows the leaves to fully extend and release flavor. This not only means that your tea will steep evenly, but the flavor will be richer and more delicious.

Another important consideration is that the unit is very easy to maintain. The lid and the filter come off and you can simply toss them in the dishwasher.

Cons:

If you have oversized mugs with a very wide opening, you might have trouble placing the teapot above your mug. It’s designed to fit an up to 3.5″ opening in diameter, so keep this on your mind.

After a while, some customers have mentioned that the device starts to leak.

The Verdict:

The Adagio Teas ingenuiTEA teapot is a high-quality tea infuser with a modern design for greater convenience. It’s the perfect choice for people that are passionate tea drinkers, large families, or tea part gatherings. If 16 ounces is not enough, you can even get the 28-ounce version, which will ensure you have enough tea for the whole day.

Best Spoon And Ball: OXO BREW Twisting Tea Ball

OXO BREW Twisting Tea Ball Infuser
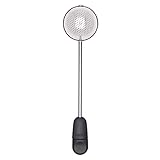
Going back to basics, we introduce the OXO BREW twisting tea ball type tea infuser. It’s the most widely known and used single-serving tea infuser, which makes most people feel comfortable. The unit is a high-quality, stainless steel version that features a unique twisting mechanism and a long handle for an even more pleasant experience.

Pros:

The OXO Good Grips twisting tea ball infuser is made of strong, high-quality stainless steel, which makes the unit very durable and safe for use.

To stand out from the competition, the OXO BREW model features a twisting mechanism that is used to lock the ball. This makes the filling very easy and it leaves space for the leaves once the ball is closed – you can’t overfill it.

The product is very simple and easy to use, however, that didn’t stop the designers to think about every little detail. The OXO BREW has a very long handle that works for all types of mugs and glasses. Regardless of the height, you’ll be able to comfortably stir your tea. Plus, you have a plastic non-slip cover on top of the handle that allows for a better grip and stays cool even when more than half of the infuser is in hot water.

Just like the rest of the recommendations, the OXO model is dishwasher safe.

Cons:

On the downside, we should mention that the device can only be used for a single-serving cup and the ball is small, which is typical of tea ball type tea infusers.

The Verdict:

For people that enjoy the classics, the OXO BREW twisting tea ball tea infuser is a great pick. It looks and feels like a spoon, that releases flavor and makes delicious tea. Steeping is even, cleaning is effortless, and filling is easier than ever.

Best For Travel: Contigo 2034154 Stainless Steel Travel Mug

Contigo West Loop Stainless Steel Vacuum-Insulated Travel Mug with Spill-Proof Lid, Keeps Drinks Hot up to 5 Hours and Cold up to 12 Hours, 16oz Steel/BlackContigo 2034154 is one of the highest-quality travel mugs that also features a tea infuser attachment, making it incredibly attractive for everyone that likes to enjoy a hot (or cold) cup of tea on the go.

Pros:

The Contigo 2034154 is made of stainless steel, or in other words, is built to last. Plus, the strong construction makes it so much more reliable in holding the temperature of the liquid constant. In fact, this unit can hold hot liquids up to 5 hours and cold up to 12 hours.

The plastic parts are BPA-free, so you’ll know that your health won’t suffer from harmful chemicals.

The unit uses an exclusive auto seal technology, so it can prevent spills. Without troubling your mind, you can place it in a bag full of books, documents, or other precious stuff, as the unit doesn’t leak and doesn’t spill.

Best of all, it can hold up to 16 ounces, which is more than three regular teacups. You can fill it before going out and have tea for the whole day.

With these features, we’ll say that this travel mug is great on its own, but with the tea infuser attachment, it becomes the perfect tool for tea lovers.

For those who appreciate good design, the Contigo stainless steel travel mug has 24 colors for you to choose from. You can match it with your bag, backpack, or simply pick your favorite color.

Cons:

Since its primary purpose is to fit the needs of travelers, the tea infuser attachment is small, which can prevent the full flavor of the tea from developing.

Additionally, the unit is quite pricey compared to our other recommendations, considering you need to pay for the infuser attachment separately from its basic price.

The Verdict:

The Contigo stainless steel travel mug is the best solution for people that like to drink freshly brewed tea while traveling. The unit has a strong construction, with auto seal and vacuum functionalities that hold the temperature of the drink constant for many hours.

Conclusion:

Our best overall choice is Fred & Friends MR. TEA silicone infuser, which is unique, fun, efficient, and very convenient. The unit is easy to use and clean, as it’s dishwasher and microwave-safe. We believe that it can be the perfect gift for your tea-loving friend, a way to make kids drink tea more, and a mood-booster on a hard day.

While most people go for the adorable Fred & Friends’ design, serious tea enthusiasts will want something larger and more professional, which is why we chose the Adagio Teas ingenuiTEA teapot as our highest-quality pick. This teapot features the amazing concept of dispensing tea from the bottom, by placing it above your mug. It’s large, very convenient, and still easy to maintain and clean. It’s the unit that most hard-core tea drinkers will approve of.

Another single-serving choice is the classic OXO Good Grips twisting tea ball model. The unit is an improved version of the typical ball-type tea infuser, as it features a long handle which makes it look and feel like a spoon. This tea infuser is very simple, durable, and one of the easiest products to use.

Finally, we chose the Contigo Travel Mug as our best travel mug. While there are many travel mugs available on the market today, the Contigo model stands out with its tea infuser attachment, durable construction, large space, and no-spill auto spill functionality. Whenever you’re on the road, the Contigo 2034154 won’t disappoint you.

Everything You Need To Know About Tea Infusers

Knowing a little more about tea infusers will help you figure what will work for you best. For example, do you know what are the advantages of using a tea infuser instead of regular tea bags; what are the advantages and disadvantages of different types of tea infusers; and how to prepare the perfect brew? Keep reading to find out the answers.

Why Use A Tea Infuser?

There’s nothing wrong with using tea bags for drinking tea. They’re perfectly safe and just as healthy as loose tea leaves. However, as many passionate tea lovers will tell you, the flavor is very different.

Although more convenient, tea bags are tightly packed, and the tea leaves are chopped or even minced, so they can fit in the packaging. Unfortunately, this affects the taste, as there’s no space for tea leaves to expand and release the flavor. As a result, tea from tea bags can taste bland or bitter. Using a high-quality tea infuser can change your opinion on tea, as the flavor is much more intense, making the drink more delicious.

Another reason for choosing a tea infuser are the health benefits. Like we mentioned, sometimes tea leaves need to be crushed, chopped, or smashed to fit in the tea bags, which can destroy some of the nutritional properties of certain teas. There’s a much better chance to get your daily dose of antioxidants and potent polyphenols from loose tea leaves.

Types Of Tea Infusers

Some tea experts believe that the best way to enjoy the health benefits and flavor is to brew the tea leaves in a large pot and then use a strainer to remove them before consuming. However, seeing how many options you have today, you can easily get the same tea quality from a variety of different types of tea infusers.

Tea Infuser Baskets/ Brewing Baskets

Experts and passionate tea lovers will probably opt for brewing baskets as their preferred choice. The reason for this is that brewing baskets are very spacious and they allow the leaves to flow freely in the water. Of course, there are a variety of sizes you can choose from, but baskets are not meant for making one cup of tea. This type is a great choice for families or couples who want to brew the perfect tea at home.

Tea Balls Infusers

The most popular and basic type is the tea ball infuser. This model is the opposite of the above-mentioned brewing baskets. While the baskets were designed for making large quantities of tea at once, the ball infusers are made for single-serving cups. You should only use them for one cup of tea and with a small number of tea leaves, otherwise, the small spacing won’t allow for the flavor of your tea to develop properly.

If you believe the ball type tea infuser is for you, we have the OXO Good Grips Twisting Tea Ball, as the best tea infuser in its category.

Silicone Tea Infusers

Silicone tea infusers are a variation of the ball infusers. They’re also meant for a single-serving cup of tea but differ in the material from which they’re made. While the ball infusers are made from stainless steel, the silicone tea infusers are made of silicone (BPA-free). People choose silicon tea infusers because they’re shaped artificially and in a fun way. They’re the perfect choice for you and your kids.

Our best overall recommendation, the Fred MR. TEA is a silicone type of tea infuser.

Travel Mugs

When you’re traveling, commuting to work or university, camping, or simply spending a day in the park, you’ll want a freshly brewed tea. This is the reason why people invented travel mugs with a tea infuser inside them, which can hold the liquid either hot or cold. Plus, they’re very convenient and easy to use.

For all the travelers and on-the-go tea drinkers, we recommend the Contigo stainless steel travel mug that features a tea infuser.

Teapot Infusers

If you’re a fan of tea parties, then you’ll need something more serious and larger. Although brewing baskets are large, teapots take things to the next level. You can serve two to three people with a brewing basket, while you can serve up to four or five people with a teapot, depending on its size, maybe even more.

The vintage choice would be ceramic and porcelain teapots, but today you can also find teapots made of cast iron, clay, glass, and so on.

Our highest-quality pick, the Adagio Teas ingenuiTEA, is a unique and modern variation of the classic teapot.

Tips For Steeping Loose Tea Leaves Perfectly

Assuming that brewing tea means bringing water to a boil and leaving the tea leaves for 10 minutes inside is the first mistake. Typically, you’ll know that you’ve made a mistake if the flavor is a little off, or if the tea is a little bland, or bitter.

Here are some tips to help you make delicious tea:

  • You need different water temperatures for different types of teas. For example, for black or dark tea, you can use almost boiling water, while for green or bright tea leaves you should leave boiled water at room temperature for five minutes before inserting the leaves. To be more precise, here are some temperature regulations, according to L’AtelierduThe:
    • 75-85°C for Green Teas
    • 87-95°C for Oolong Teas
    • 79-90°C for White Teas
  • Buy high-quality tea with whole leaves. The flavor depends on the quality of the tea leaves. If the leaves are processed in some way (chopped, crushed, minced) they’ll lose nutrients and flavor, and may even become bitter.
  • Take out the leaves before drinking. If you leave the tea leaves for too long they may also make the drink too intense and bitter. Every herb is different, so research the appropriate brewing time for your favorite type of tea to get an aromatic and delicious taste.
  • Sugar is not a solution for bitterness. Your tea may turn bitter for some of the above-mentioned reasons, but you shouldn’t try to fix the situation with sugar, as you’ll only make the drink less healthy. Refined sugar is the worst option. Consider changing something in your steeping process before reaching out to sweetener, or use a natural alternative like honey or agave syrup.

How To Find the Best Tea Infuser?

Tea infusers are pretty straightforward and simple, yet you still need to pay attention when trying to find the best tea infuser for your needs.

Do you need an appliance that can hold large quantities of liquid? Do you need the tea infuser to be portable? Do you need something for the road? Although tea infusers differ a lot based on their main purpose, there are still some things you need to consider, regardless of what type of unit you want to buy.

Easy to use

Tea infusers are designed for brewing loose tea leaves quickly and efficiently. Since the main reason why people use tea bags, instead of loose tea leaves, is convenience, tea infusers need to offer something similar. Complicated, hard to figure out, heavy and big tea infusers can turn a pleasant experience into an annoying one. Therefore, look for simple and easy-to-use units.

Easy to Clean

The same principle of convenience applies here, too. You’ll want a tea infuser that’s easy to clean by hand, or it’s dishwasher safe. While some stainless steel or metal tea infusers are more durable, they can also have sharp edges between the holes where tea leaves usually get stuck. To avoid the frustration of having to unstuck used tea leaves from the tea infuser, look for

appliances that are easy to clean and maintain.

Steeping Evenly

Tea lovers know that making tea isn’t just placing a tea bag for 10 minutes into hot water. In fact, the temperature of the water and the steeping method can really affect the flavor of the tea, which is why you need a high-quality tea infuser that steeps tea leaves evenly. This is the reason why we made sure all of our recommendations can produce a perfect brew.

Before You Go

We hope that our reviews will help you find the best tea infuser for your specific needs. However, if you’re still undecided, you can use our essential buying guide to filter through the massive amount of products offered on the market today, and carefully select what works for your best.

Additionally, make sure to follow the links for each product to find out in-depth specifications, product descriptions, current prices, and customer reviews.

You can also check out our blog because we have many more product reviews, product guides, and recipes that will spark your appetite for sure.

Want to see our favorite tea infusers one more time before you go? Here they are!

Best Overall
Best Quality
Best Spoon And Ball
Best For Travel
Genuine Fred MR. TEA Silicone Tea Infuser
Adagio Teas ingenuiTEA Bottom-Dispensing Teapot,clear,16 oz
OXO BREW Twisting Tea Ball Infuser
Contigo West Loop Stainless Steel Vacuum-Insulated Travel Mug with Spill-Proof Lid, Keeps Drinks Hot up to 5 Hours and Cold up to 12 Hours, 16oz Steel/Black
Features: 3.25 x 4.75 x 1.75 inches, single-serving type, BPA-free silicone, dishwasher and microwave safe, a variety of fun designs.
Features: 5.25 x 4 x 6.5 inches, 16 oz serving, tritan BPA-free plastic, 3.5" diameter.
Features: 4.48 x 1.4 x 10,51 inches, single-serving type, stainless steel, twisting feature, dishwasher safe.
Features: 16.0 ounces, BPA free, vacuum insulation (hot up to 5 hours and cold up to 12), 24 colors, auto seal technology.
Best Overall
Genuine Fred MR. TEA Silicone Tea Infuser
Features: 3.25 x 4.75 x 1.75 inches, single-serving type, BPA-free silicone, dishwasher and microwave safe, a variety of fun designs.
Best Quality
Adagio Teas ingenuiTEA Bottom-Dispensing Teapot,clear,16 oz
Features: 5.25 x 4 x 6.5 inches, 16 oz serving, tritan BPA-free plastic, 3.5" diameter.
Best Spoon And Ball
OXO BREW Twisting Tea Ball Infuser
Features: 4.48 x 1.4 x 10,51 inches, single-serving type, stainless steel, twisting feature, dishwasher safe.
Best For Travel
Contigo West Loop Stainless Steel Vacuum-Insulated Travel Mug with Spill-Proof Lid, Keeps Drinks Hot up to 5 Hours and Cold up to 12 Hours, 16oz Steel/Black
Features: 16.0 ounces, BPA free, vacuum insulation (hot up to 5 hours and cold up to 12), 24 colors, auto seal technology.

Raspberry Chia Seed Pudding

Appliances Reviewed is reader-supported. When you buy through links on our site, we may earn an affiliate commission.
As an Amazon Associate I earn from qualifying purchases.

“an amazingly nutritious and tasty cup of raspberry pudding”

Chia seed pudding is one of the most versatile foundations for a sweet treat. This is because chia seeds have no taste, so the pudding will acquire the taste of the ingredients used in combination. As a big fan of this light and healthy delight, I have tried so many flavors including, strawberry coconut, peanut butter cookie dough, blueberry, matcha, cinnamon roll, and all the possible variations with chocolate. Trust me, I can write a mini-book for all the ways you can make chia seed puddings. However, today I’m sharing with you this raspberry chia seed pudding recipe that is definitely a finger-licking flavor and one of my favorites.

I would choose a chia pudding over any other type any day because of three main reasons. First, it’s ridiculously easy to make. Everything that you’ll need for this recipe is a blender (one of these immersion blenders will do), the ingredients listed below, and two small bowls or one bowl and a glass/jar/mug or whatever you have. The preparation time is less than five minutes, although you’ll need to leave it in the fridge for a couple of hours. My tactic is to leave it in the fridge overnight, so that way I have a sweet and refreshing breakfast waiting for me when I get up.

Second, you can adjust the flavor to suit your taste. When you’re making a chia pudding the final result is a very light but also dense and creamy consistency. The taste comes from whatever you put inside the mixture. If you’re a fan of chocolate, you can add cocoa powder with honey as a sweetener, and sprinkle chocolate chips on the top. Raspberries, blueberries, and strawberries are the stars of the fruity, sweet, and sour flavor, while peanut butter is an amazing ingredient when you like something nuttier. In this recipe, I added vanilla and dates as the main sweeteners, but feel free to substitute if you have a specific preference. Just be careful not to overpower the raspberry flavor with other strong ingredients.

Finally, this raspberry chia seed pudding is the only dessert that you can truly enjoy without feeling guilty. It’s good for our health, incredibly nutritious, and it’s low in calories.

Did you know that chia seeds are high in fiber, protein, B vitamins, zinc, magnesium, and Omega 3s? Yes, you can get all that in this tasty dessert, so without further ado, here’s how to make it!

The first step is to add the milk, vanilla extract, dates (without seeds!), and raspberries in a blender or a food processor. Mix until you get a smooth consistency without lumps.

After this transfer the mixture into a small bowl, glass container, mason jar, ice cream jar, or a simple mug. Fill two-thirds of the container, leaving space for the topping. Next, fold in the chia seeds. Stir well until they’re incorporated in the mixture.

Place the chia mixture in the fridge and let it rest for at least 2 hours so that you can let the chia seeds absorb the liquid and get a gel-like consistency. Leaving it overnight is also a great option, especially if you plan to make this recipe for breakfast.

After you put the chia mixture in the fridge, make the topping. Simply place the blueberries, raspberries, and milk in the blender and mix until smooth. Transfer the blend into a small bowl and refrigerate. You can also prepare the topping right before serving the chia pudding, but I like to do leave it cool in the fridge. I find it a lot more refreshing and delicious when it’s cold – it actually reminds me of ice cream.

Once the chia pudding is ready for serving, take it out of the fridge and pour the raspberry-blueberry mixture over it. Finally, sprinkle chocolate curls and garnish with two or three fresh raspberries and one mint leaf between them. This way, not only it tastes delicious, but it looks spectacular too. So, don’t forget to snap a picture and show off in front of your friends and family.


Prep Rest time Total Servings
5 minutes 2 hours 2 hours 5 minutes 1

Ingredients

For the pudding:

  • ⅓ cup chia seeds
  • 1 cup milk (alternative: plant-based milk)
  • 1 tsp vanilla extract
  • 2-3 dates
  • ½ cup raspberries (fresh or frozen)

For the topping:

  • 2 tbsp blackberries (fresh or frozen)
  • 2 tbsp raspberries (fresh or frozen)
  • 2 tbsp milk

Optional:

  • 1 tbsp chocolate curls
  • 2-3  fresh raspberries
  • 2-3 blueberries
  • 1 mint leaf

Instructions

  • Pour the milk, vanilla extract, dates, and raspberries into a blender. Blend for a minute or two.
  • Transfer the cream into a small bowl or a glass container. Fill only two-thirds of the container, so you have room for the topping.
  • Add the chia seeds and stir until the seeds are incorporated into the mixture.
  • Place the container in the fridge and let it rest for at least 2 hours.
  • Add the blackberries, raspberries, and milk into the blender. Mix until smooth.
  • Transfer the mixture into a small bowl and refrigerate.
  • Before serving, pour the blueberry and raspberry mixture over the chia pudding and sprinkle with chocolate curls.
  • Garnish with 2-3 fresh blueberries and raspberries on top and one mint leaf.

Strawberry Jam Buttermilk Coffee Cake

Appliances Reviewed is reader-supported. When you buy through links on our site, we may earn an affiliate commission.
As an Amazon Associate I earn from qualifying purchases.

“the missing piece to your afternoon coffee”


Are you in for a yummy strawberry jam buttermilk coffee cake? The name is a mouthful, I know, and can be a little bit confusing – coffee cake without the coffee? So, let’s just address this right from the beginning.

Traditionally, coffee cakes were not called coffee cakes because they contained coffee, but because they were eaten over a cup of coffee. Can you remember any commercial or billboard for coffee brands and coffee shops? If you do, chances are there’s a delicious treat next to the coffee mug. I believe the name naturally became a trend because people fell in love with the whole ritual of sharing their afternoon coffee with friends while enjoying a tasty piece of cake. So, coffee and cake became a worldwide symbol for a pleasurable, relaxing time.

Are you thinking of inviting your friends over for a cup of coffee? Let’s make this delightful strawberry jam buttermilk coffee cake and make your rendezvous even lovelier.

To make this cake, you’ll need three mixing bowls, a 9-inch springform cake pan, and the ingredients listed below. However, don’t forget you need to stock up on coffee, too, especially if you have guests coming in.

The preparation time is no more than 15 minutes, while the baking time takes around 50 minutes. If you don’t have a 9-inch springform cake pan, you can use a different dimension or even shape (rectangle pan, loaf pan, square pan, etc.), but keep in mind that you need to change the baking time and the amount of the ingredients. Never fill the baking pan to full – ⅔ of its height is perfect – and always keep an eye on your cake while baking.

The first step is to preheat the oven to (180°C) 350°F, so it’s ready for baking while you prepare the batter.

The next step is to make the cake batter. Take a medium-size mixing bowl and combine the flour, baking powder, baking soda, and a pinch of salt. After you mix the ingredients, set the bowl aside.

Take a large mixing bowl and whisk together the wet ingredients – the eggs, buttermilk, sugar, vanilla extract, and the shortening. After the ingredients combine, gradually stir in the flour mixture. Once you get a smooth and creamy batter, set the bowl aside.

The final step is to prepare the cake pan and bake the cake. To do this, take the cake pan and grease it with cooking oil or melted butter. After this, pour the cake batter, filling ⅔ of the pan.

Place the pan in the oven and bake for 30 minutes.

After 30 minutes, take the cake out of the oven and pour the strawberry jam over it, then toss the sliced strawberries on top and sprinkle with granulated sugar. Return the cake in the oven and continue to bake for another 20 minutes.

Usually, this is a good time to start preparing the glaze – 10 minutes before the cake is baked. Crush the five strawberries in a small mixing bowl until you make a puree. After this, add the rest of the ingredients, except the pecans. Whisk in the powdered sugar, cream, and vanilla extract. Stir for a minute or two. After the blend becomes smooth and has a nice and creamy consistency, you can set it aside.

Once the cake is baked, take it out of the oven and place it on the rack. Toss the chopped pecans over the cake and spatter the glaze. However, don’t just pour the glaze, be creative and make an interesting pattern. I know the taste is important, but a visually pleasing cake is like the cherry on top – makes the whole experience much more pleasant.

Let the cake chill for 10 minutes while you make the coffee, then serve and enjoy!


Prep Cooking time Total Servings
15 mins 50 mins 1 hour, 5 mins 8

Ingredients

  • 2 cup all-purpose flour
  • 4 tablespoons shortening (melted)
  • 3 tbsp sugar
  • 2 egg
  • ½  tsp baking powder
  • ½ tsp baking soda
  • 1 tsp vanilla extract
  • 2 ½ tbsp buttermilk
  • 1 cup of sliced strawberries
  • ⅓ cup of strawberry jam
  • 1 tsp granulated sugar
  • A pinch of salt

For the glaze and topping:

  • 1 cup powdered sugar
  • 5 strawberries
  • 2 tbsp cream
  • ½ tsp vanilla extract
  • ¼ cup chopped pecans

Instructions

  • Preheat the oven to (180°C) 350°F.
  • Take a small mixing bowl and combine the flour, baking powder, baking soda, and a pinch of salt.
  • Whisk the eggs, buttermilk, sugar, vanilla extract, and shortening in a large bowl. Once the ingredients are combined, stir in the flour mixture.
  • Take a 9-inch springform cake pan and grease it with cooking oil or butter.
  • Add the batter into the cake pan and bake for 30 minutes.
  • After this, take the cake out of the oven and dollop the strawberry jam over it.
  • Toss the sliced strawberries on top and sprinkle the granulated sugar.
  • Return the cake in the oven.
  • Bake for another 20 minutes.
  • 10 minutes before the cake is done baking, prepare the glaze. Take a small bowl and crush 5 strawberries to make a strawberry puree. After this, stir in the cream, vanilla extract, and powdered sugar. Whisk all the ingredients until you get a soft and creamy consistency.
  • Once the cake is done baking, remove the pan and place it on the rack. Sprinkle the chopped pecans and pour the spatter the glaze on top, then let it sit for 10 minutes before serving.

Red Velvet Hot Cocoa

Red Velvet Hot Cocoa

Appliances Reviewed is reader-supported. When you buy through links on our site, we may earn an affiliate commission.
As an Amazon Associate I earn from qualifying purchases.

“a sweet gift for your tongue that can warm your heart”

Red Velvet Hot Cocoa

If you love a red velvet cake, you’re going to absolutely adore this sweet hot cocoa variation that’s very easy to prepare. If you have a sweet tooth, then this might be the perfect treat for whenever those sugar cravings kick in.

Let’s face it – we don’t always have one to three hours to make that delicious, creamy chocolate cake we saw on the cooking channel. I mean, it’s an amazing dessert idea for special occasions and when you’re expecting guests, but what’s a better alternative when it’s just you and you don’t have much time? I’ll tell you – red velvet hot cocoa!

I’m actually doing this little mug filled with pure happiness a little bit of an injustice, as it’s more than a cake alternative and it deserves to have a special spot in the dessert menu. It’s that good! You’re looking at a very dense, creamy drink with chocolate flavor and a hint of caramel, due to the maple syrup. Prepare yourself for the familiar mouthwatering taste of chocolate, yet with an untypical and uniquely delicious twist. The distinctive red color makes the whole experience even more special.

So, without further ado, let’s get our hands chocolaty! You won’t need more than 15 minutes in total, as the preparation time is no more than 5 minutes, and the whole cooking time no more than 10 minutes. The recipe below is for a single serving, but feel free to double or triple the ingredients for whenever you want to share a cup of hot cocoa with your friends and family.

Everything you’ll need to make this recipe, aside from the ingredients, is one big saucepan, one metal bowl (if you have a double boiler that’s even better), a hand mixer (or another alternative), and your favorite mug. Sounds pretty simple, right?

The first thing you need to do is boil water over high temperature on the stove. Once the water starts boiling, turn the heat on medium, and place a metal bowl on top. Keep in mind, the bottom of the metal bowl shouldn’t touch the water in the saucepan.

Next, crush the dark chocolate into small pieces and place them in the metal bowl. The smaller the pieces of chocolate are, the faster they’ll melt, but other than that it really doesn’t matter how you crush the chocolate. When you see that the chocolate is melting, start stirring and make sure there are no lumps.

While the chocolate melts start pouring the milk very slowly. Stir at all times. This is going to help you feel the consistency and stop before you make it too watery, especially if you like your cocoa more creamy. Usually, a glass of milk (250ml) is just enough for a cup of cocoa, but you might like it better with slightly less or more milk. It really depends on your personal preferences, so don’t be afraid to change the amount a little if you feel it’s right.

When the milk blends completely with the melted chocolate, add the maple syrup and the red food coloring. Continue to stir until the color is well-mixed. This usually takes a minute or two.

Turn the stove off, transfer the cocoa into a mug, and leave it aside while you make the white cream. You can always have your red velvet hot cocoa without anything, but I believe some whipped cream on top would really set it apart.

Mix together the cream, sugar, and almond extract in a big bowl. You can use a mixer, a whisk, or simply a spoon, as it’s not much and you’ll probably have even more control whipping it by hand. Once you have a stable cream, shape it over the mug of hot cocoa.

Finally, sprinkle with anything you can find at home, like chocolate chips, coconut flakes, biscuits, cherry, or anything else that sounds delicious.


Prep Cooking time Total Servings
5 mins 10 mins 15 mins 1

Ingredients

For The Hot Cocoa:

  • 1 glass (250ml) milk (optional: plant-based)
  • 60-70g dark chocolate
  • 1 tsp maple syrup
  • 1 ½ tsp red food coloring

For the white cream on top:

  • 4 tbsp whipped cream
  • 1 tbsp powdered sugar
  • ½ tsp almond extract

Instructions

  • In a saucepan boil water over high heat. Turn to medium and place a metal bowl on top of it.
  • Crush the chocolate into small pieces and add them to the metal bowl. Stir while they melt.
  • Slowly pour the milk into the melted chocolate. Stir well.
  • Mix in the red food coloring and maple syrup. Stir for one-two more minutes, then remove from heat. Transfer the hot cocoa to a mug.
  • Whip the cream together with the powdered sugar. Add the almond extract while whipping.
  • Add and shape the whipped cream over the hot chocolate.

Enjoy your delicious treat!

Different Types of Coffee Makers

Appliances Reviewed is reader-supported. When you buy through links on our site, we may earn an affiliate commission.
As an Amazon Associate I earn from qualifying purchases.

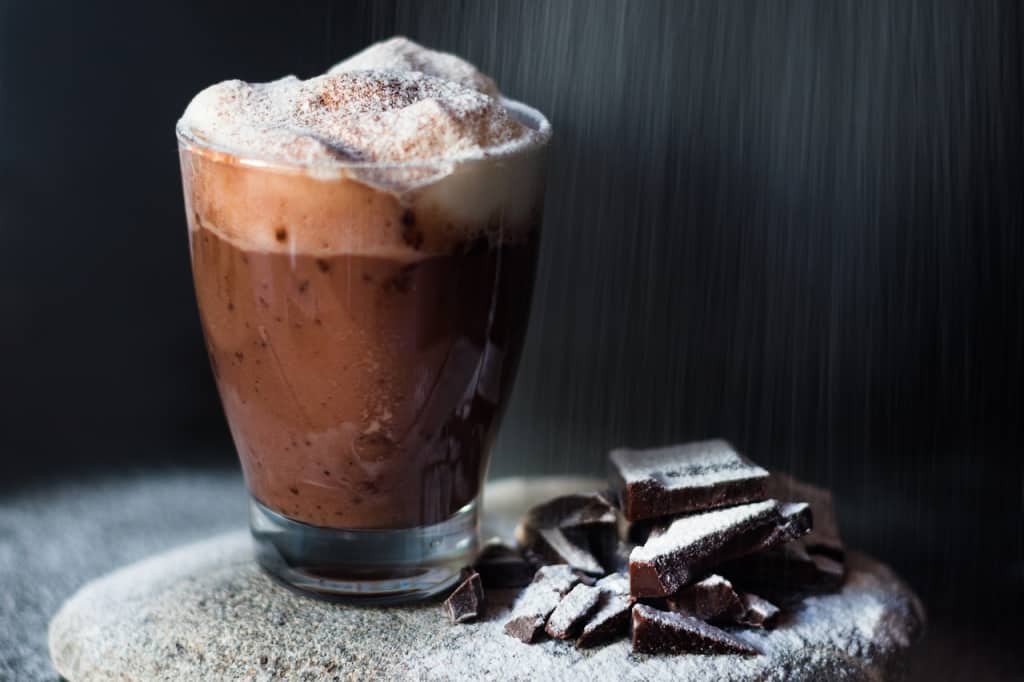
Coffee is the staple drink of every morning routine. Well, nearly every morning routine – a 2018 study published by the National Coffee Association reported that 64% of Americans drink coffee, and 79% of those coffee drinkers brew coffee at home. And this year – 2020 – is pretty much the year of staying at home (because you know, coronavirus), so if you weren’t brewing coffee in the comfort of your kitchen before, you’re probably doing it now.

There are quite a few perks of brewing your own coffee. At the very least, it helps save money. But coffee connoisseurs say that the trend with coffee these days is all about taste. It’s less about getting a kick out of your bed in the morning, and more about enjoying the drink. And with so many affordable, readily available coffee makers out there, drinking instant coffee is slowly becoming a thing of the past. Not to mention that one of the biggest instant coffee producers in the world – Nescafé – is owned by Nestle, a company that has a long, long list of transgressions against nature and humanity.

In any case, we’re here to introduce you to the four most popular types of coffee makers that can help you get a beautiful cup of java in the comfort of your home. We’ll go over the pros and cons of each coffee maker so that you can decide which one is the best choice for you depending on your lifestyle, budget, and taste.

1. Drip Coffee Makers

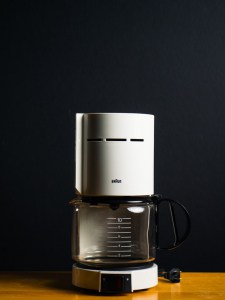
Let’s start off with the classics, and nothing is more contemporary Americana than drip coffee makers. Drip coffee makers can be found in homes, hotels, motels, offices, support groups… Their popularity can easily be attributed to their ease of use, consistent results, and ability to produce a big batch of coffee with minimal effort on your part.

Drip coffee makers are also quite versatile in terms of quantity – you can get one that brews anything between one and fourteen cups of coffee.

How does it work?

Drip coffee makers work using electricity. You plug the machine in, fill up the filter tray with ground coffee, fill up the water pitcher with water, and set the carafe on the heating plate. All that’s left for you to do is to press the start button and wait for your coffee to brew. A shower head at the top drips the hot water into the coffee grounds, allowing it to extract them before it passes into the carafe ready to drink.

Pros:

A drip coffee maker is affordable, easy to use, and produces consistent results.

Cons:

There’s not a lot of variety in taste as far as the brewing process goes, but you can get some variety switching up the beans you use.

Another drawback is that if the carafe sits on the heating plate for too long, the coffee may start tasting a bit burnt.

We recommend it for:

Families, homes, offices, and entertaining. Instead of sitting at the stovetop, babysitting your brew while your guests wait in the living room, you can let the machine do it for you.

2. Espresso Machines

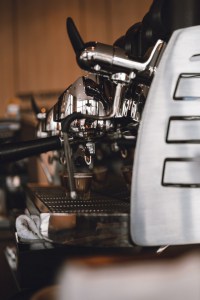
Espresso machines can bring the full coffee shop experience to your home. If you’re an avid espresso lover, you may find the effort and additional cost that come with an espresso machine well worth the cup of full-bodied, rich, tasty espresso brew.

An espresso machine offers a lot of versatility, as you can recreate coffee shop specials like Americano, macchiato, cortado, and so on. If your espresso machine doesn’t come with a frothing wand, you can get your own milk frother to get that beautiful cream which is the signature ingredient in espresso-based beverages like cappuccino.

Espresso is usually made with dark roasts and fine grinds, which results in a concentrated, rich cup of coffee.

How does it work?

Espresso machines are electric-powered. There are different types you can choose from, which vary the level of labor that will be necessary on your part. You can decide between manual, semi-automatic, automatic, to super-automatic. The way they work is by heating water to a high temperature and allowing it to pass through a metal filter cup filled with pressed coffee grounds at quite a high pressure.

Pros:

Espresso machines can help you get consistently delicious, rich cups of espresso.

They also allow a lot of versatility to recreate coffee shop specials.

Plus, a lot of them come with a frothing wand.

Cons:

Espresso machines are usually quite a bit pricier than other coffee makers.

Other drawbacks of manual espresso machines are that they’re quite labor-intensive and require some technical knowledge.

We recommend it for:

Espresso enthusiasts and those who appreciate bold, rich-tasting coffee.

3. Pour-Over Coffee Makers

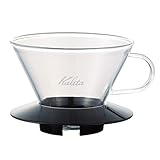
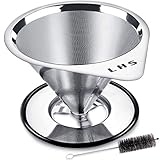
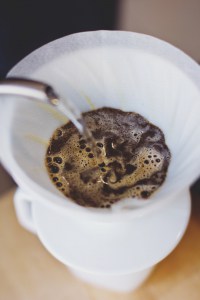
Pour-over coffee makers are a simple yet delicate way to produce a custom cup of coffee that’s per your taste. Pour-over coffee makers consist simply of a cup with holes on the bottom, which you can place over any mug or carafe to make as much coffee as you want.

Taste-wise, pour-over coffee makers generally produce a delicious, full-bodied cup of java.

How does it work?

Pour-over coffee makers generally consist of a cup with a base that’s meant to go on top of mugs or carafes, and holes at the bottom that allow the coffee to pass through to the container below. The cup-shaped coffee maker has a cone-shaped funnel in which you place a paper filter and fill it up with medium ground coffee. Then, you slowly add water to the pour-over coffee maker in several phases. The first pour is meant to allow the coffee grounds to bloom, i.e. to activate them and extract the initial flavor. The following gentle pours are meant to finish the coffee grounds’ brewing process.

Pros:

Pour-over coffee makers are generally simple to use – although it’s important to take note of the series of pours to get the optimal taste of the coffee. They’re also quite compact and thus easy to travel with.

These coffee makers are also quite affordable.

Plus, they offer versatility when it comes to the amount of coffee you want to make.

Cons:

Making pour-over coffee is a process. It takes a hands-on approach on your part, and may require more time than some other coffee makers to brew the coffee.

We recommend it for:

Pour-over coffee enthusiasts and those who need a single cup of coffee at a time.

4. Moka Pots

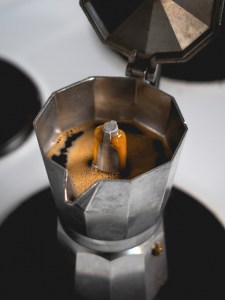
Moka pots are my go-to method when I want a rich, full-bodied cup of coffee that gets as close to an espresso as possible without actually using an espresso machine. Although it’s not as dark as an espresso, a Moka pot will give you a thick, deeply dark cup of delicious coffee that’s also made on the principle of using high-pressure to extract the coffee grounds.

Moka pots are one of the most affordable coffee makers you can get your hands on, and you can also use them to make espresso-based drinks like lattes and macchiatos.

Depending on the capacity of the Moka pot you buy, you’ll be able to create anywhere from one cup to twelve cups of coffee.

How does it work?

Moka pots work with stovetops or gas burners. They contain three chambers: the bottom chamber is filled with water, and the middle chamber (a metal filter) is filled with coffee grounds. As the water in the bottom chamber heats up, it generates steam. The pressure from the steam causes the hot water in the bottom chamber to travel up through the middle chamber where the coffee is, and extract it. Finally, it travels through a tube into the top chamber, where you get your lovely, piping hot, finished brew.

Pros:

Moka pots are quite eco-friendly – they don’t create any waste other than used coffee grounds (which you can always find uses for!).

Overall, Moka pots produce a consistently good cup of coffee and they’re a great, much cheaper alternative to espresso makers.

Lastly, they work pretty fast – so you won’t have to wait too long for your coffee to be ready.

Cons:

A Moka pot should be cleaned regularly, which can be a bit of a hassle considering it has three parts. To be fair, you should regularly clean any coffee maker you decide to get (or already own).

We recommend it for:

Anyone looking for an espresso alternative or a richly deep cup of coffee.

We also highly recommend it to campers – with a Moka pot, you’ll have coffee anywhere you go.

A Few Words Before You Go…

Hopefully, you enjoyed our guide to the most popular coffee makers you can get for your home. Depending on your taste, budget, or how much effort you’re willing to put it, you can decide which one’s right for you. And don’t forget – every perfect cup of coffee starts with freshly ground beans!

A Guide to the Different Types of Coffee Roasts

Appliances Reviewed is reader-supported. When you buy through links on our site, we may earn an affiliate commission.
As an Amazon Associate I earn from qualifying purchases.

Coffee is all about taste. Sure, it’s the world’s go-to beverage for a morning pick-me-up, thanks to its stimulating caffeine content, but most of us don’t drink coffee just to get a kick out of bed. We drink coffee because of its unique, delicious flavor.

However, coffee beans don’t exactly come out of the ground with that signature taste we all know and love. The key to bringing out that characteristic, rich flavor of coffee is roasting.

In any case, there’s no single type of coffee roast. Whether it’s in a specialty coffee shop or just the local market, you’ve noticed that there’s a variety of coffee roasts, ranging from light to dark, and each of them has a unique flavor. To help you decide what type of roast you’re into, let’s take a look at the different types of coffee roasts, as well as how roasting changes the taste of the green coffee beans.

What’s Coffee Roasting?

Roasting green coffee beans triggers a chemical reaction that changes the taste of the coffee, turning it into a consumable product. While unroasted green beans have a similar makeup to roasted coffee – like the amount of caffeine, protein, sugar, and acid – they lack the beautiful taste that roasted coffee has been giving us since roasting became a thing in 15th-century Persia and the Ottoman Empire.

Several chemical reactions occur when green beans are roasted. One of them is the Maillard reaction – a chemical reaction between amino acids and reducing sugars – which is also responsible for the beautifully popping flavors and colors of seared steaks, caramel, toasted bread, marshmallows, cookies, chocolate, and even beer!

Guatemalan green coffee beans in their natural habitat

The different types of coffee roasting are a result of how long and at what temperature coffee beans are roasted. In general, beans are roasted by quickly increasing their internal temperature to high degrees, and then being quickly cooled to end the roasting process. Unlike green beans, roasted beans have that scent that, to us, is coffee, and are crunchy, since all the moisture has been removed.

For the most flavorful cup of coffee, you’ll want to use freshly roasted and ground beans. You can always ground your beans yourself by getting a great little manual coffee grinder for your home.

The Different Types of Coffee Roasts

Let’s take a look at the different types of coffee roasts, what temperature they require, how they taste, and what some popular roast names are in each category.

The different types of roast: light, medium, medium-dark, and dark.

Light Roasts

The first step on the coffee-roasting ladder are light roasts. Light roasts are brightly colored, have the highest level of acidity, and in general retain most of the coffee’s original features.

Light roasts are achieved when the bean is pulled out from the heat after the first crack. This usually means that lightly roasted beans reach an internal temperature between 356°F and 401°F.

Although people usually think the darker the bean the higher the caffeine content, green beans and therefore light roasts have the highest caffeine content, as the caffeine content decreases with continued roasting and higher temperatures.

Light roasts have a light brown color and don’t have any oil on the bodies of the beans, as they haven’t been roasted long enough for the oils to seep out.

Light roasts have the taste of a toasted grain, and have a slightly pronounced acidity. They also have a more fruity scent, which makes the origin of the coffee bean more easily detectable for the coffee connoisseur. Although you can use any roast for any coffee brewing method, coffeeshops usually prefer using light roasts for milder coffee types, such as pour-over coffee and drip brews.

Some popular light roasts are Cinnamon, New England Roast, Light City and Half City.

Medium Roasts

Medium roasts are apparently the favorite of people in the United States, which is why they’re sometimes referred to as the American roast (although George Carlin had a different take on an American roast, amirite?). Overall, medium roasts strike a delicious balance between body and acidity.

Medium roasts are roasted longer than light roasts, and thus reach a higher internal temperature which is somewhere between 410°F and 428°F. Medium roasted beans usually reach this temperature after the first crack, and right before the beginning of the second crack.

Medium roasted beans have less caffeine than light roasts, but more caffeine that medium-dark and dark roasts.

Medium roasted coffee has a brown (sometimes specified as medium-brown) color, and no oil on the surface of the bean. In terms of taste, medium roasts have a stronger and sweeter taste than light roasts, but they also have less of that grainy scent. Overall, the aroma, flavor, and acidity of light roasts are quite beautifully balanced, which is probably why medium roasts are a popular favorite.

Some popular roasts in the medium category are American roast, Breakfast Roast, City Roast, and Regular Roast.

Medium-Dark Roasts

Medium-dark roasted beans are dark brown, with finally some oil beginning to show on the surface. This is because they’re roasted just long enough to get the essential oils moving, bolden the flavor, and activate a whole new host of seductive scents that tickle your sensations. Medium-dark and dark roasts have a richer taste and bolder bodies.

Medium-dark roasts generally reach an inner temperature of about 437-450°F. This happens around the beginning or middle of the second crack. The longer, hotter process allows for the taste and aroma of roasting to become more pronounced.

Medium-dark roasts have a rich, almost spicy, full-bodied taste – certainly heavier than that of light and medium roasts – with aromas and flavors that are fully unleashed. In this process, the acidity in the flavor virtually disappears. Rather, medium-dark roasts have a unique bittersweet aftertaste.

Keep in mind that while light and medium roasts have more pronounced acidity, medium-dark and dark roasts have a more pronounced bitterness. So next time you’re at a coffee tasting (perhaps in the coziness of your kitchen), pay attention to this difference and see which one tickles your fancy.

Some popular medium-roasts you may have come across are Full City, Vienna Roast (which borders on a dark roast), and After Dinner Roast.

Dark Roasts

Darkly roasted coffee beans have the darkest color, which can range from dark brown, like the color of dark chocolate, to almost black. They have quite a bit of oil on the surface, which gives the beans a lovely sheen. Dark roasts offer a rich, full-bodied, smokey, and almost burnt taste which is a result of the roasting process, so the original taste of the green coffee bean is pretty much gone at this point.

To create a dark roast, the beans need to reach the highest internal temperature, which is  somewhere between 465 and 480°F. This temperature comes either at the end of the second crack, or sometime after. However, beans are almost never roasted beyond 490°F, as at that point the coffee bean loses all positive flavor characteristics, and starts tasting like charcoal or tar. Blegh.

As we’ve mentioned, the aroma of dark roasts can be attributed to the roasting process, so the origin flavors and acidity of lighter roasts are lost. As it’s the most roasted bean, dark roasts have the lowest caffeine content, and also the bitterest taste.

Due to the boldness of the flavor, dark roasts are often the go-to option of baristas for making espresso and espresso-based beverages like lattes. Dark roasts are a great choice for espresso-based drinks as their rich taste is excellently complemented by creamy, silky milk and froth.

But there’s even variety among dark beans. The roast can range between slightly dark to charred, so make sure you check what kind of dark roast you’re getting before purchasing the beans.

In fact, the body of the coffee will depend on the exact temperature, or point, where the bean was removed from the heat. The body is fully developed at the beginning of the second crack, but begins to diminish right after that. So for instance, one dark roast, like Full-City Roast, will have a much fuller body than another dark roast, like Italian Roast, due to the higher temperature and roasting time of the latter.

Dark roasts have been quite popular in Europe, which is why some common roasts in this category include French Roast, Italian Roast, Viennese Roast, Spanish Roast, Espresso Roast, Continental Roast, or European Roast. Some other, less obvious dark roast varieties are High Rost and New Orleans Roast.

A Few Words Before You Go…

Hopefully, our guide on the different types of coffee roasts has helped you get a better idea of what you’d like to try next, or how your favorite bean comes into being.

At the very least, knowing all this can help you look mighty smug on your next trip to the coffee shop.

Best Pour-Over Coffee Maker: Reviews of Our Favorites in 2020

Appliances Reviewed is reader-supported. When you buy through links on our site, we may earn an affiliate commission.
As an Amazon Associate I earn from qualifying purchases.

You don’t have to dough out a lot of money for an expensive espresso machine to get great-tasting coffee in your home. A simple and elegant solution is a pour-over coffee maker. Pour-over coffee makers are easy to use, affordable, and most important of all – allow you to create a cup of java that has all the notes and flavors that can be extracted from a good coffee bean.

With a little bit of skill, like knowing how to get the right water temperature and at what pace to pour the water over the coffee beans, you will be the composer of your own coffee symphony. Plus, you’ll always have control over how much coffee you want to make, and how strong you want the flavor. Of course, to get the most subtle flavors from this method, you’ll need to have the best pour-over coffee maker first.

Luckily, we’re here to help you find just that: the best pour-over coffee maker to buy in 2020. We scoured the market and rounded up the top four options for the perfect cup of joe. We reviewed them in detail so you know what to expect from performance, price, and maintenance.

Make sure you read our handy buying guide at the end of the article, where we’ve outlined some important factors you should consider when deciding which pour-over coffee maker is the best choice for you.

Best Pour-Over Coffee Makers

Before we get to our reviews, here’s a quick look at our top recommendations:

Best Overall: Kalita Wave 185 Pour-Over Coffee Dripper

Kalita Wave Pour Over Coffee Dripper, Size 185​, Makes 16-26oz, Single Cup Maker, Heat-Resistant Glass, Patented & Portable,blackThe Kalita Wave 185 made it to the top of our list for its wonderful performance – it consistently makes flavorful coffee with detectable, intricate notes. The unique wave design and flat bottom allow for just the right amount of coffee to be extracted, to get a full-bodied cup of coffee. It’s a great choice for both professionals and beginners in the world of coffee-making, as getting a perfectly-balanced cup doesn’t require much technical know-how.

You can get this pour-over coffee dripper in one of three materials: glass, stainless steel, and porcelain.

Pros:

The Kalita Wave 185 features a smart design that allows it to consistently produce a flavorful cup of coffee. Cone drippers require carefully selected grounds and pouring skills to get a great cup of coffee, but this isn’t the case with the Kalita. The bottom of this dripper, where the coffee beans are placed, is flat, which gives more space for the water to drain while providing uniform extraction. Additionally, the bottom has three holes through which the water drips evenly.

The design of the Kalita makes it really easy to use. That’s why it’s a great choice for beginners, as they won’t have to time and measure the pouring of water to get great results.

But the great design doesn’t end with the dripper itself. The special Kalita filters that are to be used with the dipper have a patented wave design which minimizes the contact between the filters and the sides of the dripper, i.e. the brewing space. This creates a kind of a water pool on top of the bed of beans which helps maintain uniform extraction, preventing the possibility of a bitter-tasting outcome from over-extraction.

The Kalita is quite small, yet you can use it to make about three to four cups of coffee. You place the dripper over a cup or carafe and put between 26-45 grams of coffee (depending on how many cups you want to make). Then, you start with a single short pour to help the coffee bloom, and once the bubbles die down, you simply fill up the dripper to the top and wait for it to drain a couple of times until you have the desired amount of coffee. This means that although it won’t take up space in your cupboard – or backpack, it’s also a great portable option! – you’ll still be able to make enough coffee for the whole family.

Lastly, the Kalita is compatible with most cups and carafes. As the full length of the bottom is about 4-inches, you can easily place it on most regular containers without worrying about the coffee spilling over or the dripper sliding in.

Cons:

To get the best results with the Kalita, you also need to purchase the wave-y Kalita filters. The drawback here is that they’re a bit pricier than other filters and not as easy to find in stores, so you’ll have to purchase them online.

Best for Pour Over Pros: Hario V60

Hario V60 Ceramic Coffee Dripper Pour Over Cone Coffee Maker Size 02, WhiteThe Hario V60 is a long-standing favorite for pour-over coffee lovers, and for good reason: it embodies everything a traditional pour-over coffee maker should be. The durable material and design of the dripper are ideal for getting that perfect cup of pour-over coffee. However, it’s not enough to have a great tool in your hands to create something beautiful: you need a master to get the best possible results. In this sense, the Hario V60 is a great choice for pros that are ready to spend the time required for a proper brewing cycle, doting over the dripper with a gooseneck kettle.

Pros:

The Hario V60 is designed for a hands-on pour-over brewing experience. There’s a large, single hole at the bottom which means that the taste of your coffee will change based on how slowly or quickly you add water to the beans. If you enjoy those several meditative minutes measuring water temperature and then timing the pour, you’ll love the Hario, and what it has to offer. You can brew one to three cups with a single brewing cycle.

The Hario is also designed so as to give you the most flavorful cup of java. The conical shape will allow floral and fruity notes to be more detectable in your beverage, while the spiral ribs allow the coffee grounds to expand as the coffee is extracted.

Like the Kalita, the Hario also gives the best results with the same brand’s proprietary filters. However, they’re cheaper than the Kalita and also more widely available in coffee shops and stores.

The Hario offers great value for your money, as it’s quite affordable yet durable. The sturdy ceramic dripper retains heat so that by the end of the brewing process, your cup of joe will still be piping hot.

Last but certainly not least, the Hario boasts one of those simple, yet elegant looks that are hard to pass up on. True to form, it’s manufactured in Japan. In addition to ceramic, you can also get the Halio in a heat-resistant borosilicate glass design, which is the most beautiful, or in plastic, which is the best for traveling.

Cons:

Filters other than the Hario filters designed for this pour-over coffee maker, don’t work with the V60 and often end up tearing at the bottom.

Most Eco-Friendly: LHS Paperless Pour-Over Coffee Dripper

LHS Pour Over Coffee Dripper Stainless Steel Coffee Filter Metal Cone Filter Paperless Reusable Coffee Filter Single Cup Coffee Maker 1-2 Cup With Non-slip Cup Stand and Cleaning BrushThe LHS pour-over coffee dripper is our favorite eco-friendly option as it doesn’t use any paper filters – the cone itself is the filter. And no, it won’t spill! If you don’t have the opportunity to compost, and you feel guilty every time you throw out a paper filter, the LHS is a sweet little environmentally-conscious option. The LHS is also the most budget-friendly pour-over coffee maker on our list.

Pros:

The LHS is designed to bypass the needs of a paper filter. The cone is made of mesh stainless steel, which won’t allow coffee to drip from the sides. The base contains extra-fine wire mesh, which prevents much residue from ending up in your cup of coffee.

You can use the LHS as a reusable metal filter for an existing pour-over coffee maker, or as a standalone pour-over coffee maker. It comes with a wide, detachable metal base, i.e. cup stand, which fits over most regular-sized mugs or travel canteens.

The LHS is a great portable option. It’s quite lightweight and compact, measuring about 8 cm over 13.5 cm, so it can easily fit in your backpack. Plus, the stainless steel material is quite sturdy, so it won’t bend and get deformed while you’re traveling. You can make one to two cups of coffee at a time.

Lastly, the LHS is quite easy to clean and maintain. Once you’re done making your cup of coffee, you can just throw away the beans, rinse the filter, and wipe it. It comes with a little brush which you can use for more thorough occasional cleaning. Plus, the LHS is dishwasher-washable, so you can also just stick it on the top rack of your dishwasher.

Cons:

While the LHS is made from stainless steel, its type of stainless steel alloy (18/8 grade) includes about 18% chromium and 8% nickel. While this is common in cookware and generally deemed safe, some people prefer 100% stainless steel. So if you’re in that category, this dripper may not be the best option for you.

Best Design: Hario Woodneck Drip Pot

Hario Woodneck Drip Pot, 480ml, Olive WoodWe’re back to this Japanese manufacturer for the best designed pour-over coffee maker: the Hario Woodneck Drip Pot. The style is timeless, elegant, and slick – it will look beautiful in any home or office. But the Hario Woodneck is not just a pretty face – it uses a delicate cotton flannel cloth instead of regular filters to produce a rich, full-bodied cup of coffee. One downside of this pour-over coffee maker is that it’s quite pricey.

Pros:

The Hario Woodneck Drip Pot is truly wonderful for coffee lovers that want to taste every last bit of what a coffee ground has to offer. The drip cloth has smaller holes than any metal or paper filters, so the coffee grounds get more extracted before the water passes through the mesh. It does take a bit longer than paper or reusable metal filters, but the resulting coffee is well worth an extra minute or two.

Rather than changing the taste of the coffee like some paper filters, the drip cloth allows intricate notes to dominate the taste of your cup of java. The slow extraction allows for the coffee oils to pass through to the end result, and aid in the creation of a rich, full flavor.

Much like the Hario V60, the Woodneck Drip Pot is also a great choice for hard-core pour-over coffee enthusiasts. The unique brewing process takes devotion to the method, time, and patience – but the delicious cup of coffee you get makes the effort negligible.

The Hario’s beautiful look is a combination of the woodneck glass pot, the featured filter with a wooden handle, and the delicate cotton flannel drip cloth. Together, they give this pour-over coffee maker a timeless, rustic look. You can choose from 240 ml or 480 ml-capacity options, and from dark wood and olive wood alternatives. The 240 ml is suitable for up to 2 cups, and the 480 ml is suitable for up to 4 cups.

Thanks to its reusable cloth filters, the Hario Woodneck is another eco-friendly option. The initial purchase comes with one drip cloth. Once it wears out, which should be about 6 months or so, you can order a set of three cloth filters.

Cons:

The Hario Woodneck is the priciest option on our list, so it’s not a good idea if you’re on a budget.

Additionally, the glass is a bit fragile, so you’d best handle it with care.

Conclusion

Our overall favorite pour-over coffee maker is the Kalita Wave 185 Pour-Over Coffee Dripper for its consistently excellent performance in making a flavorful, rich cup of coffee. The Kalita Wave’s design makes it a very forgiving little tool, which makes it a great choice for beginners. Even if you don’t get everything right, your coffee will come out tasting pretty good! While the Kalita is reasonably priced at $24.50, one possible drawback is that the Kalita proprietary filters are a bit pricier than regular filters.

The best pour-over coffee maker for pour-over coffee aficionados is the Hario V60, as it will give you everything you need in order to get the most intricate, delicious cup of coffee. But this dripper isn’t as forgiving as the Kalita Wave – you’ll need to have the necessary skill and knowledge on how to create that perfect cup of coffee. The Hario also offers excellent value for your money, as all three options – plastic, glass, and ceramic – are durable and affordable. The plastic is the cheapest, the ceramic the priciest, at $25.50, while glass sits between the two.

Our favorite eco-friendly option is the LHS Paperless Pour-Over Coffee Dripper, as it doesn’t use any paper filters. Rather, the stainless steel which the dripper is made of contains mesh which functions as a filter. It’s also quite compact and lightweight, which makes it a great portable choice. The LHS pour-over coffee maker is the most budget-friendly option on the list (except for the Hario V60 plastic), costing $14.99.

The pour-over coffee maker with the most beautiful design is the Hario Woodneck Drip Pot. It has an elegant, classy look and it’s made of glass and wood. A lovely addition to this coffee maker is the cotton filter which is reusable. The tiny holes in the cloth allow for a beautifully extracted cup of coffee that emphasizes all the delicate notes contained in the coffee beans. However, the Woodneck Drip Pot is also the priciest recommendation on our list. The 240 ml versions are cheaper than the 480 ml versions. Out of the 480 ml pots, the olive wood one that we have featured in our review costs $54.99.

How to Choose the Right Pour-Over Coffee Maker

Alright, so now you know what the best pour-over coffee makers are on the market – but which one is the right choice for you? Here are some tips on what to look out for when choosing a pour-over coffee maker that will suit your needs and preferences.

What’s Your Skill Level?

As you may have realized, not all pour-over coffee makers are as forgiving as the Kalita Wave. Some, like the Hario options, require that you’ve familiarized yourself with the pour-over method quite well in order to get the optimal cup of coffee. Plus, if you’re already a pro, you may want to opt for a coffee maker that has the versatility necessary to allow you to adjust the brewing process to your taste.

Of course, you may also be willing to learn, so just think over how much effort you’re willing to put into coffee brewing before settling on a coffee maker for yourself.

What’s Your Desired Capacity?

The pour-over coffee makers on our list have different capacities when it comes to how many cups of coffee you can brew at a time. Check out how much each option can yield, and see if that suits the needs of your home or office.

What’s Your Budget?

In the conclusion, we tried to give you a general idea of how much each pour-over coffee maker costs, but you should still check their current prices on Amazon. In any case, you don’t need to pay a lot of money to get a great coffee maker. The Hario V60, for instance, is quite affordable and still yields wonderful results.

Are You Stationed, or on the Go?

If you want a pour-over coffee maker for your home, any of our recommendations will do. However, if you want something that you can take with you while traveling, you should look for an option that’s lightweight, compact, and not likely to break. The LHS and the Hario V60 plastic dripper are the best portable options and great camping companions.

What Accessories Does Your New Coffee Maker Need?

Some coffee makers don’t require much, other than a hot water source. Others, on the other hand, may require that you have a gooseneck kettle from which to slowly pour water in small quantities. Additionally, some drippers need specific paper filters, while others rely on reusability.

Check what your pour-over coffee maker of choice needs, and see if you have it. If not, think whether you’d be willing to invest in it.

How Much Time You Got?

Each coffee maker has a different brewing time. This is often based on how many drainage holes they have, and how dense the mesh of the dripper or filter is. Check how long the brewing process for each pour-over coffee maker is, and decide if you can fit it in your schedule.

How Does Pour-Over Coffee Taste?

The wonderful thing about pour-over coffee makers and the reason there’s such a thing is pour-over coffee die-hard fans, is that it has a very unique, flavorful taste. The slow extraction of the beans during the measured brewing process produces a clean, light, and well-balanced cup of coffee that has all the intricate high and low notes of the coffee bean.

This means that pour-over coffee will take your taste buds someplace new, allowing you to finally make sense of those descriptions that accompany coffee beans, like fruity or flowery. Essentially, pour-over coffee prevents over-extraction and bitterness, so you only get the crisp flavor of the coffee bean.

A Few Words Before You Go…

Hopefully, our recommendations and buying guide helped you find the right pour-over coffee maker for your needs, preferences, and taste. Make sure you follow the links to the products to check their current prices and find answers to any additional questions you may have about the material, warranty, or brewing process. Soon enough, you too will be enjoying your delicate cup of joe!

You can also check out our other product reviews and guides, or try some of our favorite coffee shop grade recipes that will be the perfect addition to your cup of pour-over coffee.

Want to see our favorite pour-over coffee makers one more time before you go? Here they are! Happy brewing!

Macchiato vs Mocha: What’s the Difference?

Appliances Reviewed is reader-supported. When you buy through links on our site, we may earn an affiliate commission.
As an Amazon Associate I earn from qualifying purchases.

Whether you’re trying to prove your friend wrong over what the difference between macchiato and mocha is, or you’re trying to figure out what to order on your next trip to the coffee shop, you’re in the right place.

The truth of the matter is, these two drinks are quite different – their similarity mainly lies in the fact that they’re both espresso-based beverages. However, because their names sound slightly similar, people sometimes confuse them.

So let’s find out what a macchiato is and what a mocha is, so you’ll decide which one is more to your taste.

What Is a Macchiato?

The original Italian macchiato, also known as espresso macchiato, is basically an espresso shot with a spot of foam, or frothed milk, on top. In fact, macchiato in Italian means stained or spotted – which is exactly what this drink is – a spotted shot of espresso. The initial conception of macchiato was to highlight the bold, full-bodied flavor of the espresso shot with a spot of creamy milk froth. Alternatively, a macchiato can be stained with a splash of steamed milk and then completed with a dab of foam.

However, as the macchiato traveled to the United States and other countries worldwide, the way the drink was made started to change. In a lot of American coffee shops, for instance, a macchiato is closer to a latte in that more steamed milk is added. In this version, the milk is the star or the show rather than the espresso. To make an American macchiato, a full amount of milk is steamed and poured into a mug, and then the espresso shot is slowly added into the milk, diffusing it and creating layers as it goes.

In some other European countries a macchiato is prepared like a cappuccino with one part hot water, one part steamed milk with froth on top.

So, what about the taste? The versions of macchiato which are truer to the original and don’t use too much milk, really help accentuate the bold taste of the espresso shot. Of course, this may be too intense for people that prefer milky drinks. You can always try to recreate an original macchiato in your home with a high-quality, affordable milk frother.

What Is a Mocha?

The name mocha doesn’t come from the Italian espresso tradition, nor does it come from the Italian language. Rather, it comes from the Mocha (or Mokha) region in Yemen that’s famous for producing one of the most delicious, flavorful coffee beans in the world. Historically, also, Mocha was a key part of the global coffee trade for centuries. After all, the tradition of coffee drinking that we know today emerged from the Middle East. The first known coffee consumers were the Sufis, a Muslim mystic sect, from the region of present-day Yemen.

In any case, it’s not quite clear how this espresso-based beverage was named mocha, as there’s little relation to what the drink has come to mean. At best, we could draw a parallel between the natural chocolatey flavor of the Mocha bean and chocolate being the key ingredient – next to coffee – in the mocha that’s offered in coffee shops today.

So – what’s a mocha? A mocha unites the two beautiful, complementary tastes of coffee and chocolate, creating a coffee drink that’s ideal for chocolate lovers.

Mochas are made by adding chocolate sauce to an espresso shot and then adding a full amount of steamed milk. Some coffee shops also add foam, whipped cream, and chocolate shavings.

This mocha is made with espresso, chocolate syrup, milk, and chocolate shavings!

So, while a macchiato is much less sweet, and only uses milk to help the espresso flavor pop, a mocha is quite sweet thanks to the chocolate syrup. Plus, it uses a lot more milk than a traditional macchiato, which means that espresso comes second or third in the story. In a nutshell, a mocha is a favorite among people who like espresso, but need some strong backup to diffuse its boldness. Places like Starbucks like to take it a step further into non-coffiness, by offering additional syrup options like peppermint, salted caramel, vanilla, nutmeg, and so on.

Join Our Newsletter

Never miss a thing! Our newsletter is the perfect way to stay informed about the latest recipes and reviews that we publish.